Shape Control with ControlNet
Turn sketches into photos, swap materials, transfer compositions — use structural control to tell the AI where everything goes while changing everything else.
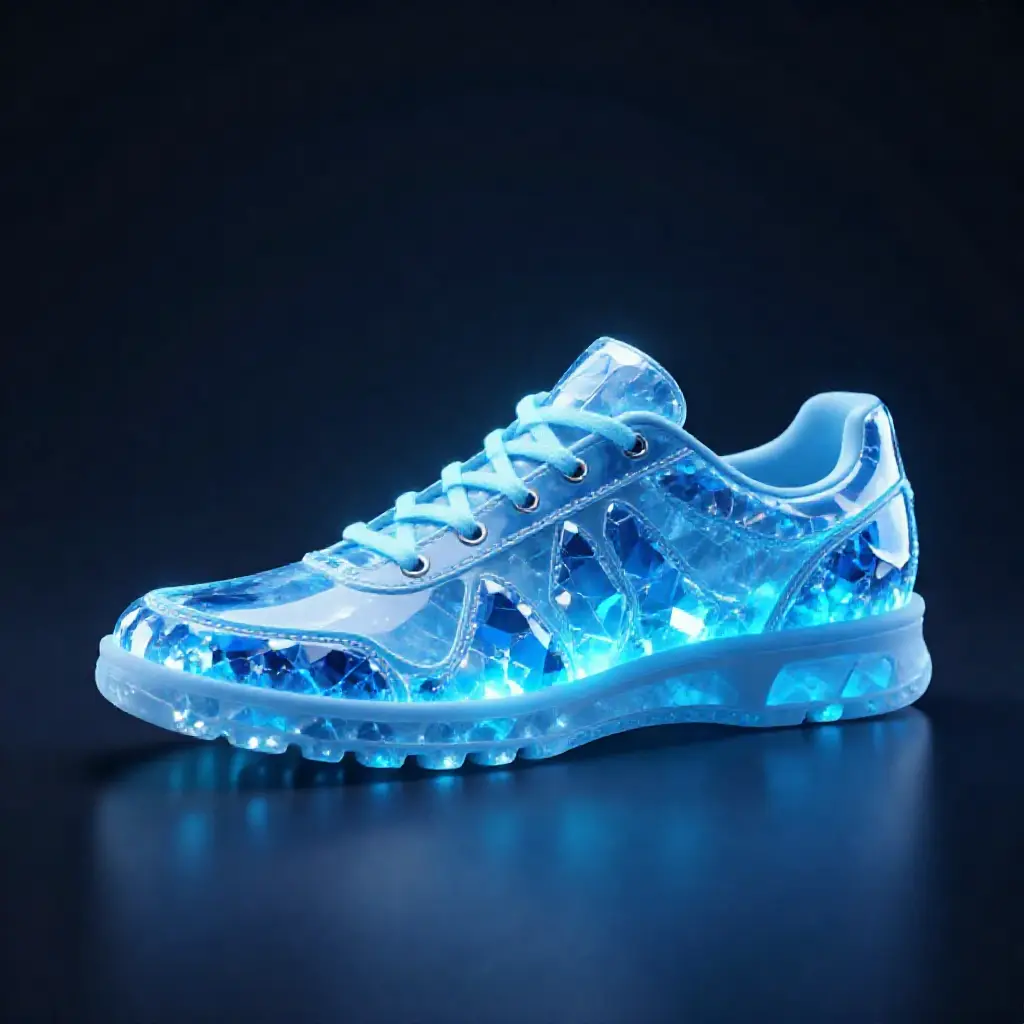
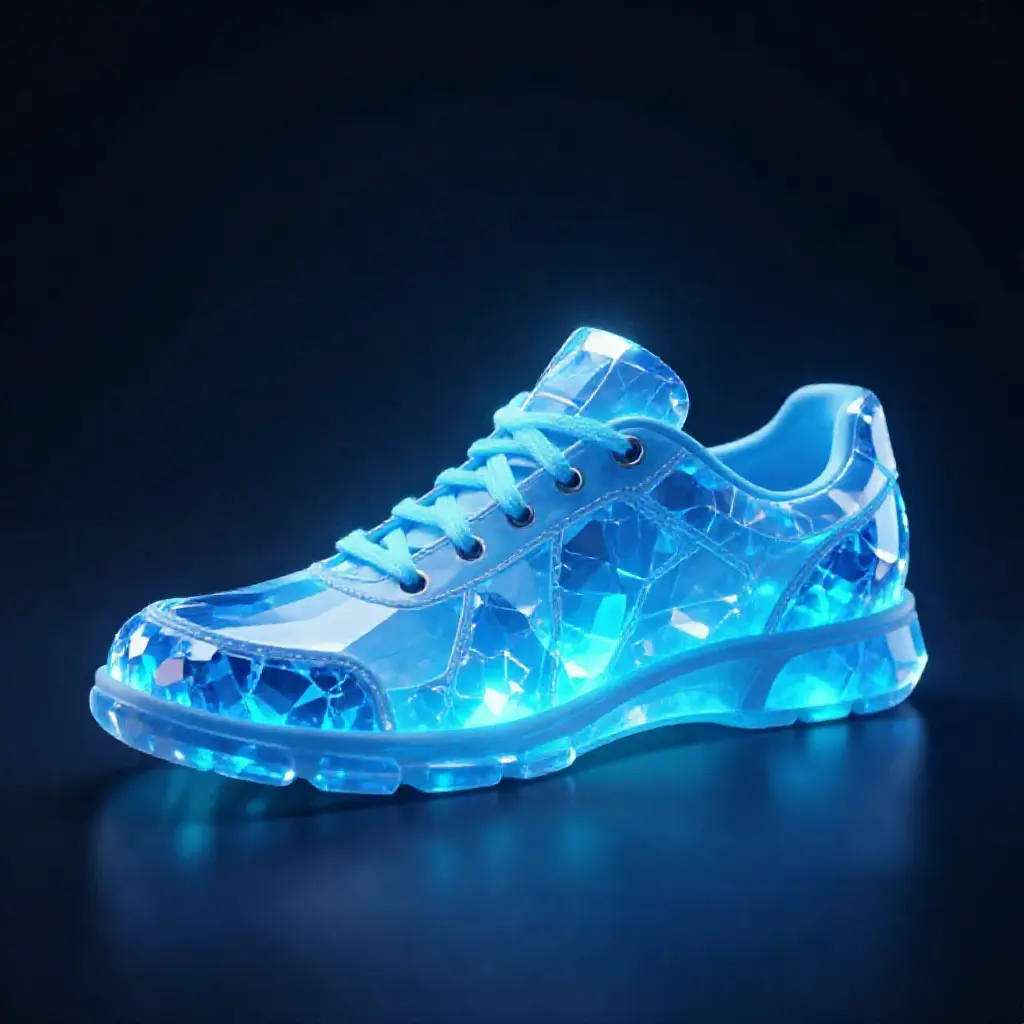
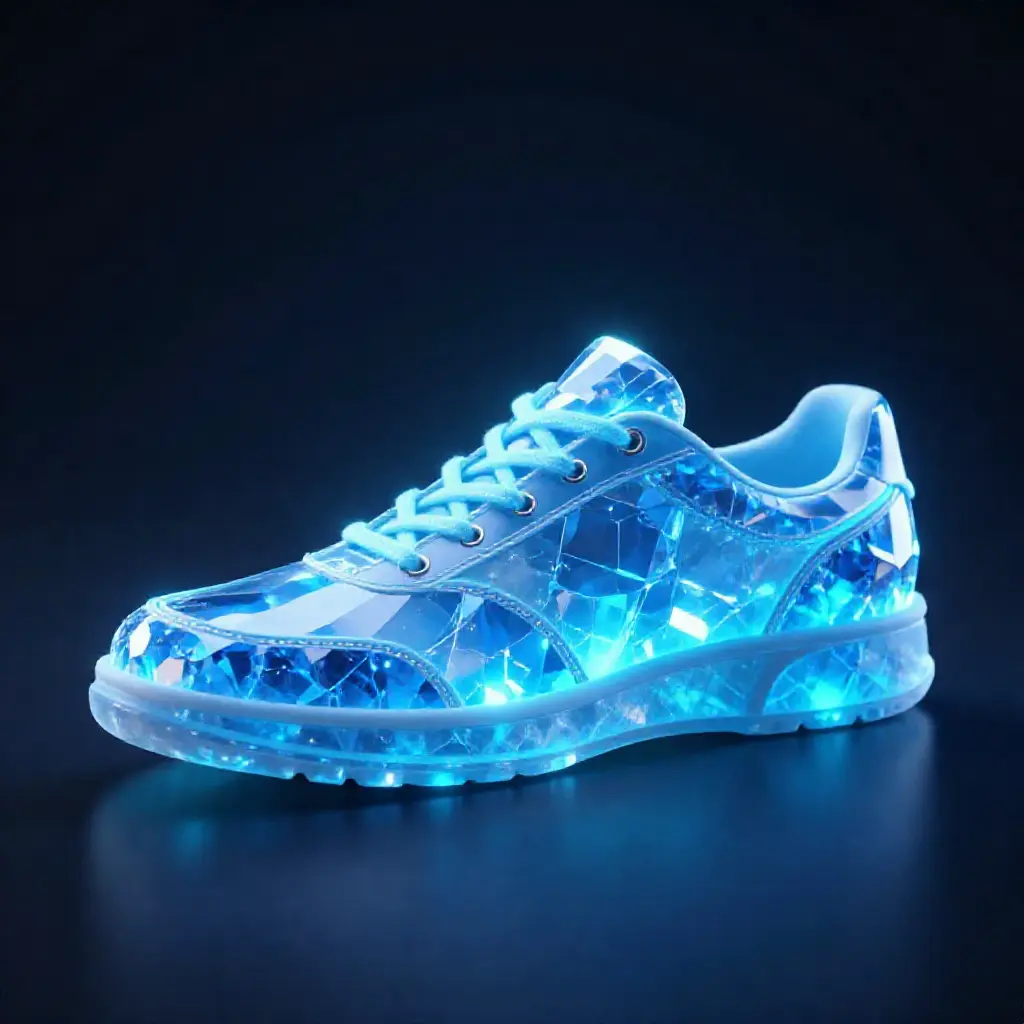
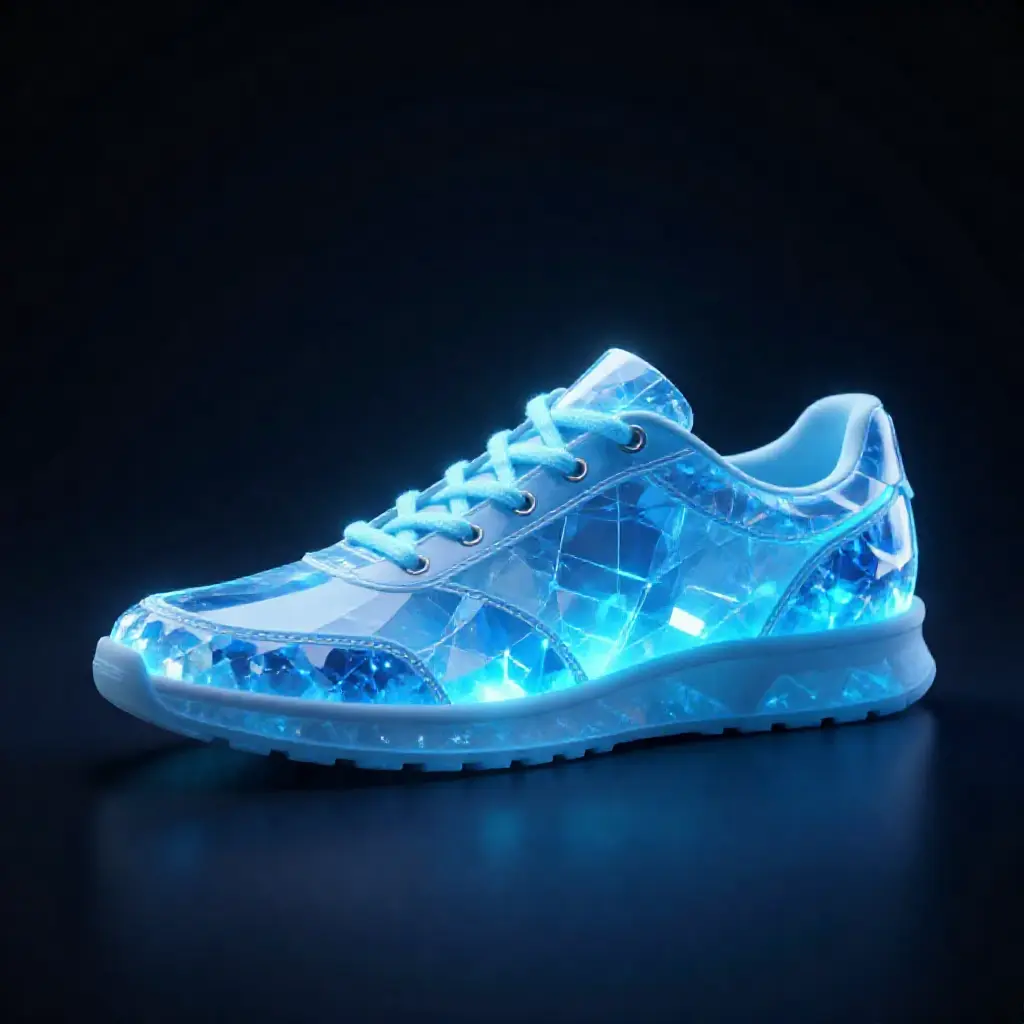
You have a product photo of a sneaker. You want to see it as a crystal sculpture — same exact shape, completely different material. Without ControlNet, the AI invents its own shoe shape. With ControlNet, you lock the silhouette and change everything else.
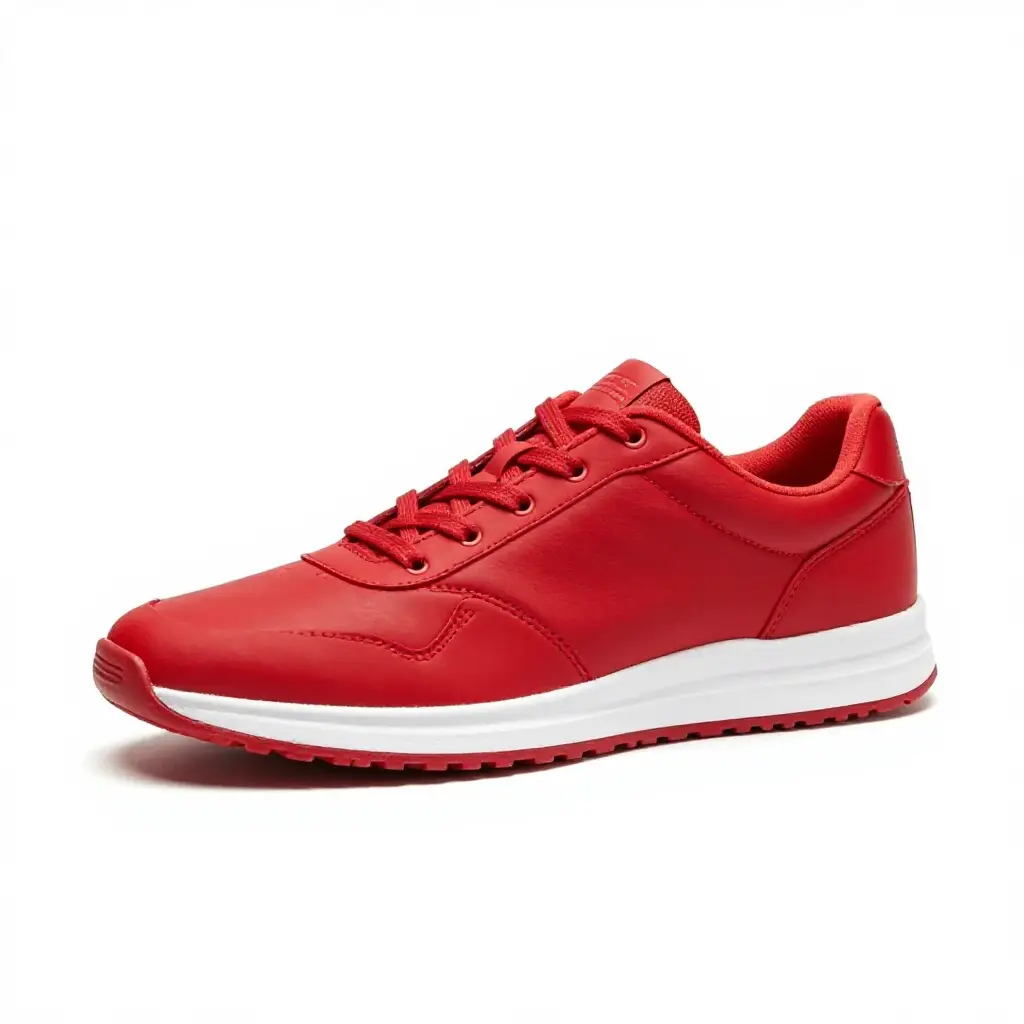

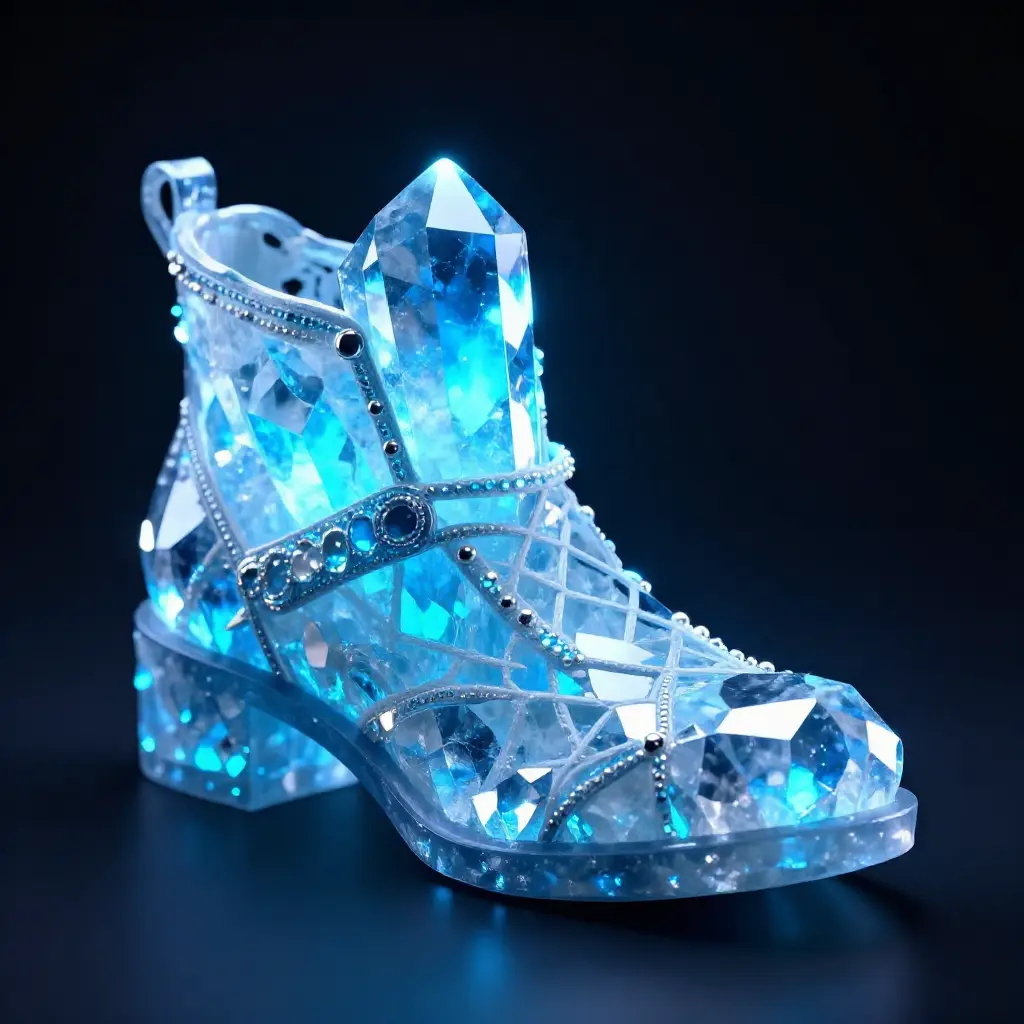
Same prompt, same seed. With ControlNet the crystal shoe follows the sneaker's exact silhouette. Without it, the AI creates whatever shape it wants.
Two commands:
More examples
ControlNet shines when the structural control and the creative prompt are dramatically different. Here are three patterns that show its power:
Portrait → Anime character
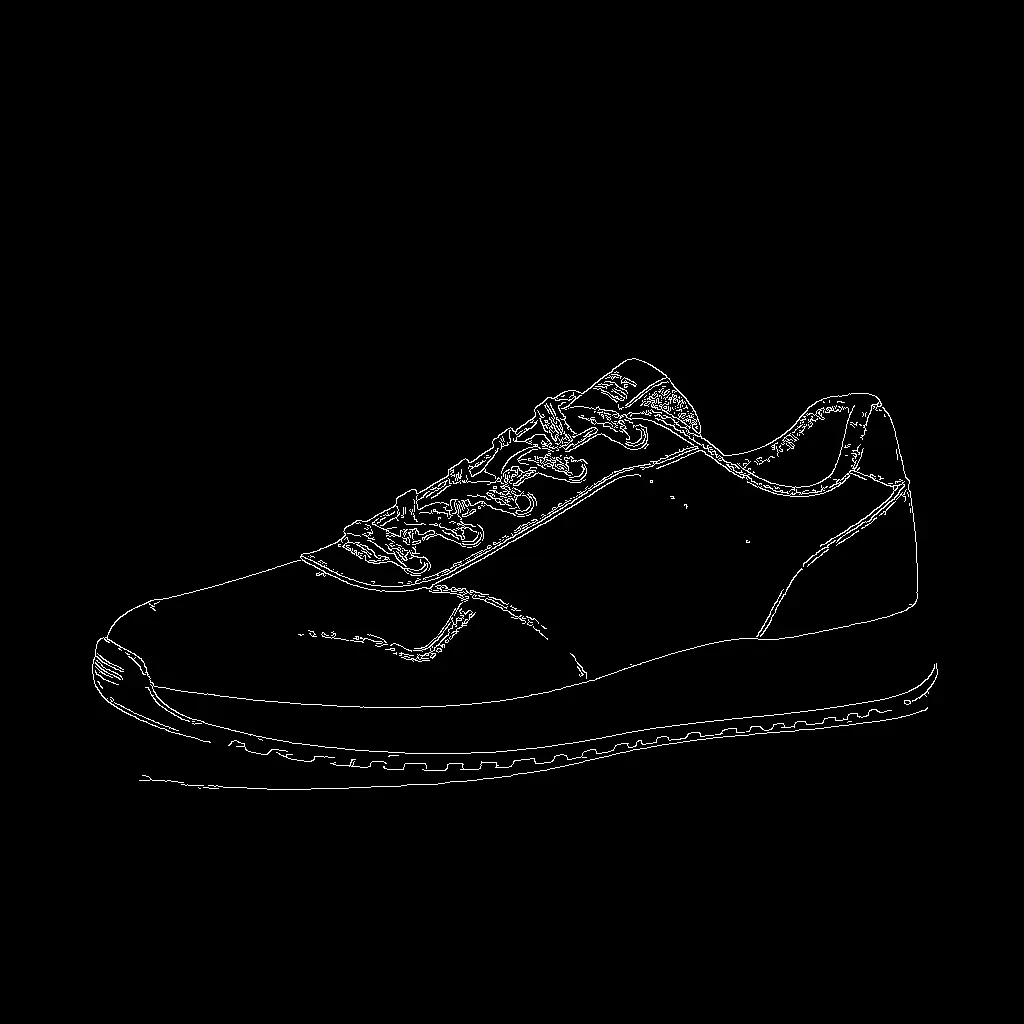
Extract soft edges from a real photo, generate as a completely different art style:
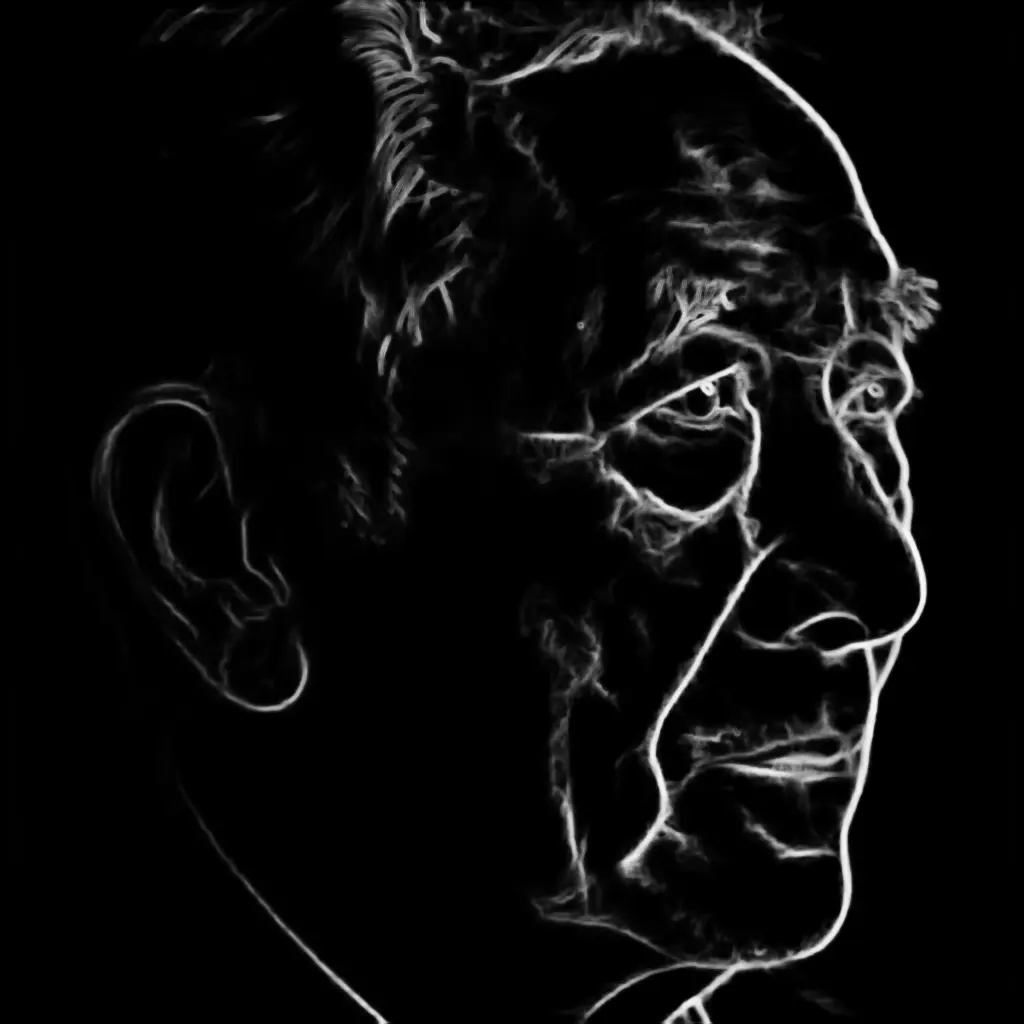
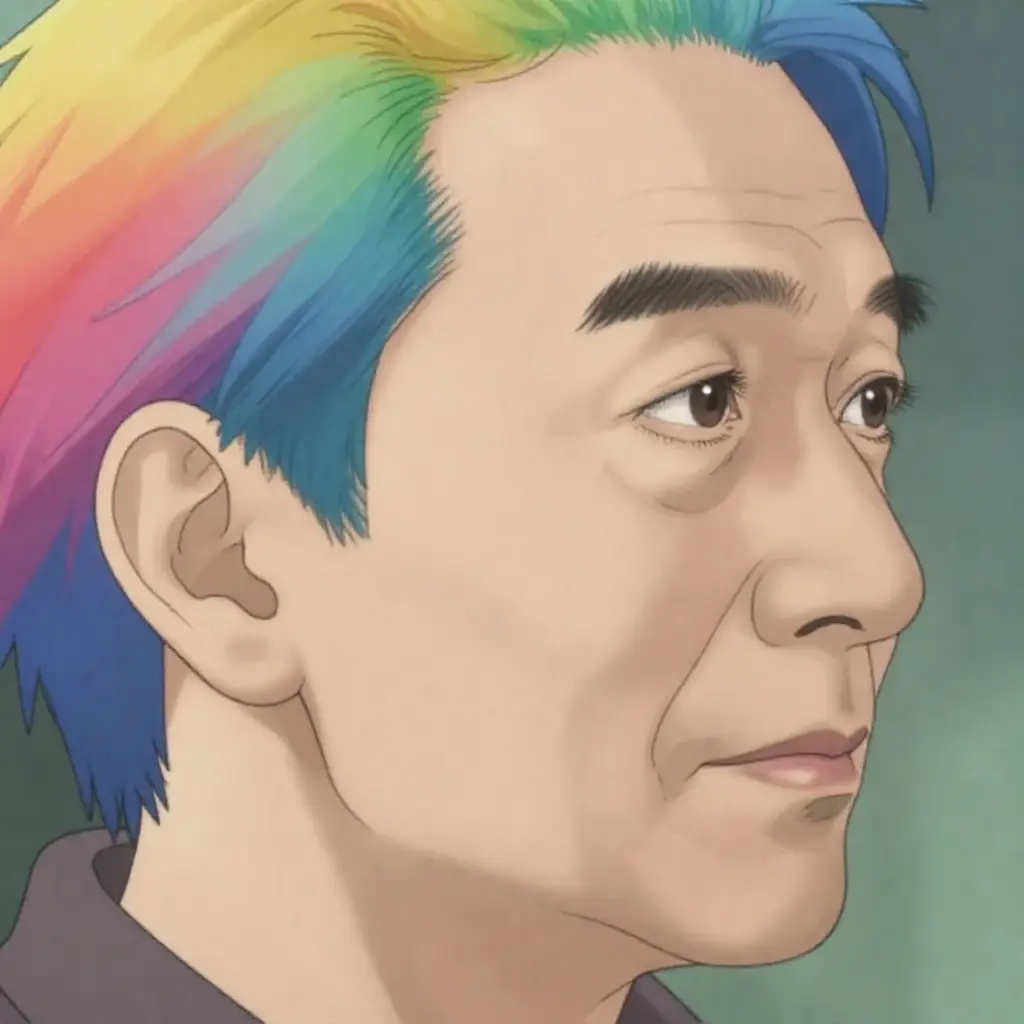
The soft edges preserve the face structure, pose, and hair outline. The model fills in anime-style rendering while following the exact composition.
Depth map → Completely different scene
A depth map captures spatial layout without any visual detail. Use it to transfer the 3D composition of one scene onto something entirely unrelated:
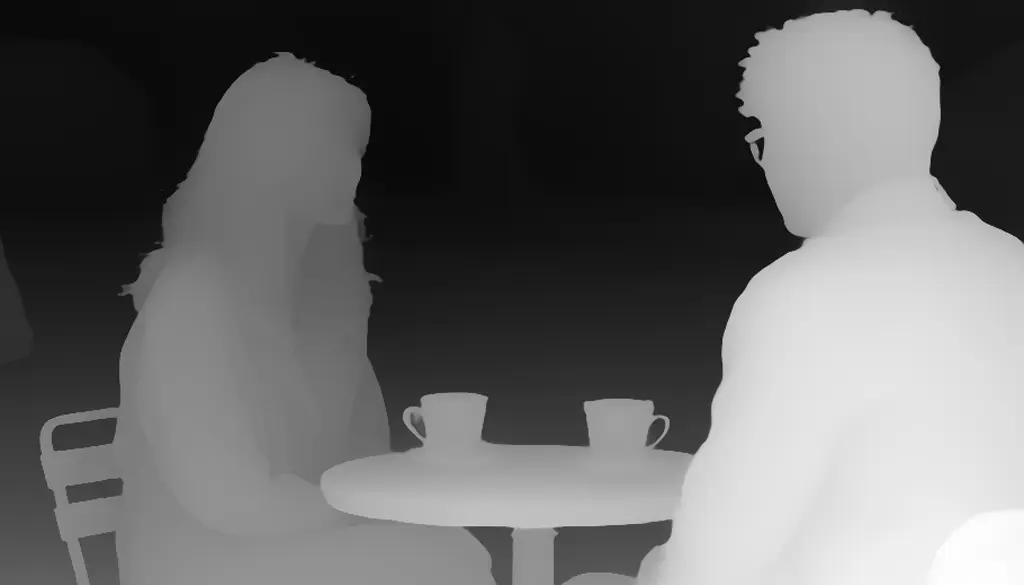
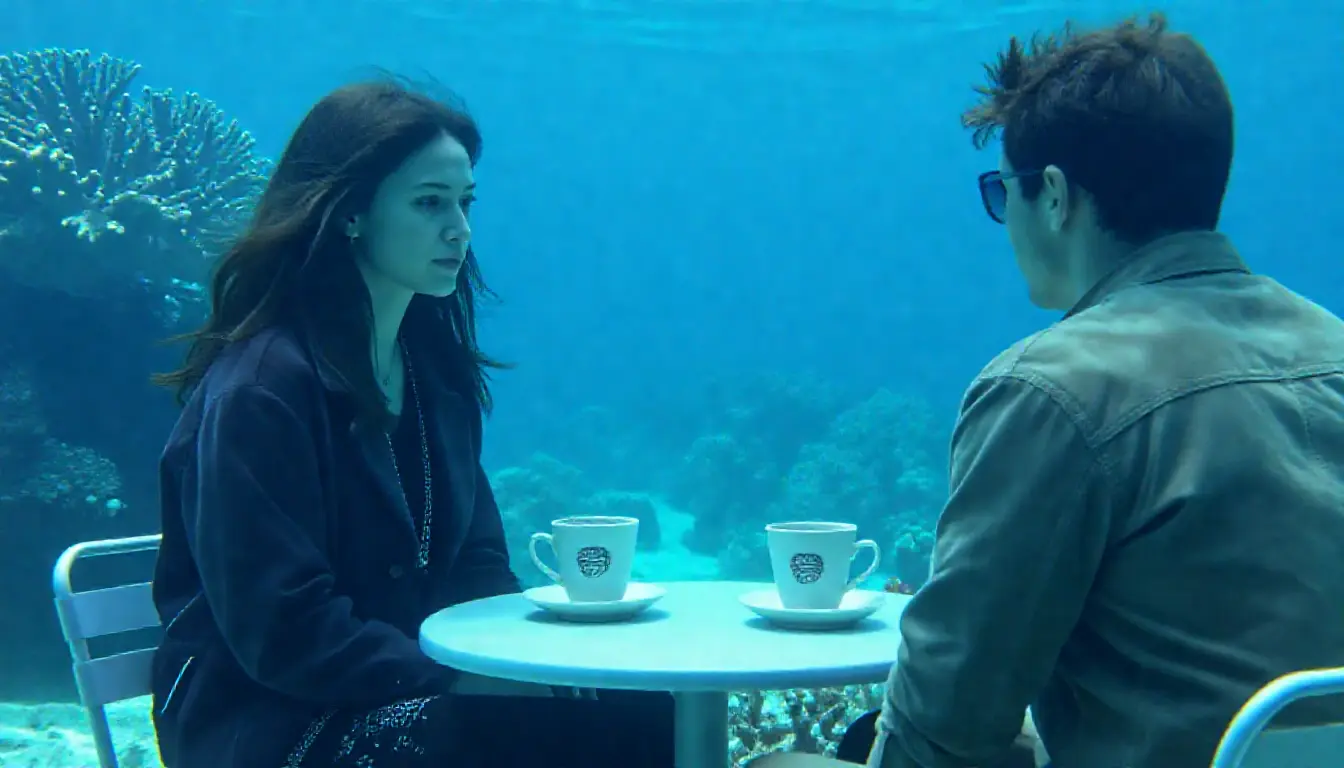
The cafe's depth map — table in the foreground, people in the middle, background behind — becomes an underwater scene with the same spatial arrangement.
Scribble → Product photo
Extract a rough scribble (like a hand drawing) and generate a photorealistic product from it:

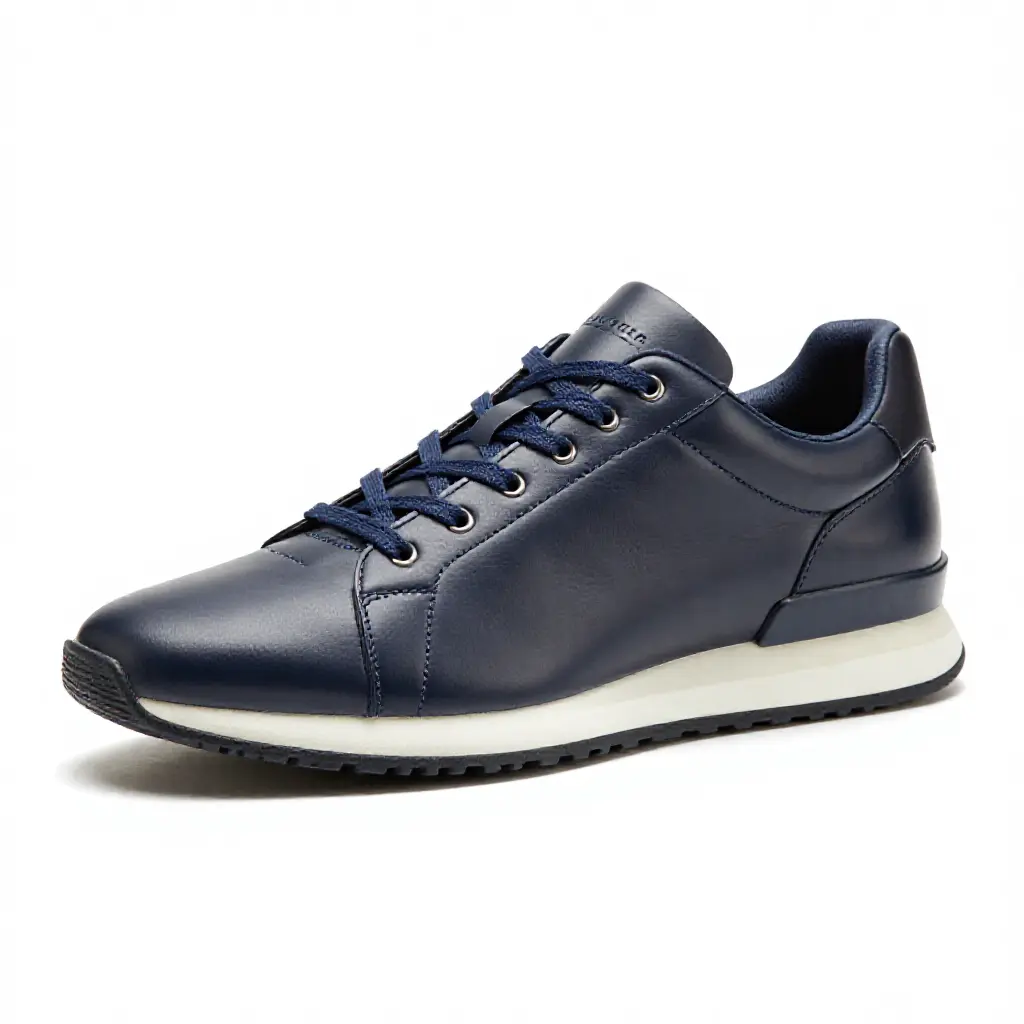
The scribble provides a loose shape guide. At 0.4 strength, the model follows the sneaker outline while adding realistic leather materials and studio lighting — without the sketch lines bleeding through.
How it works
ControlNet is a two-step process:
- Preprocess — Extract a structural map (edges, depth, pose) from any image
- Generate — Feed that map to the model alongside your prompt
The preprocessing step is model-agnostic — the same depth map works with Z-Image, Flux, SDXL, or Qwen-Image. The generation step uses model-specific ControlNet weights.
Preprocessing is always explicit and separate from generation. You inspect every intermediate artifact before generating. No magic, no surprises.
Match aspect ratios. If your source image is landscape, use —size 16:9 when generating. A landscape depth map squeezed into a square output will distort the spatial layout. The control image and generation size should have similar proportions.
Preprocessing methods
modl process preprocess extracts structural maps from any image. Each method captures different information, and that changes how the model interprets the same prompt.
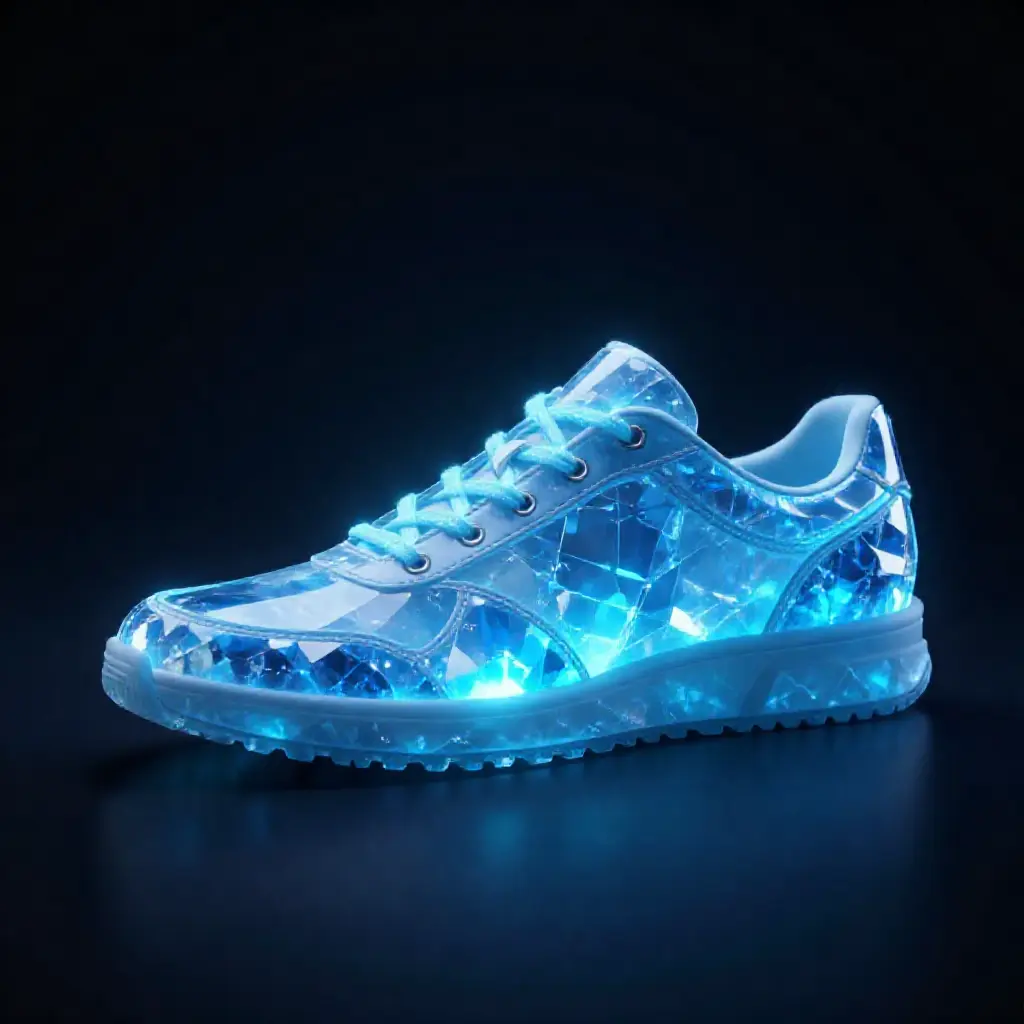
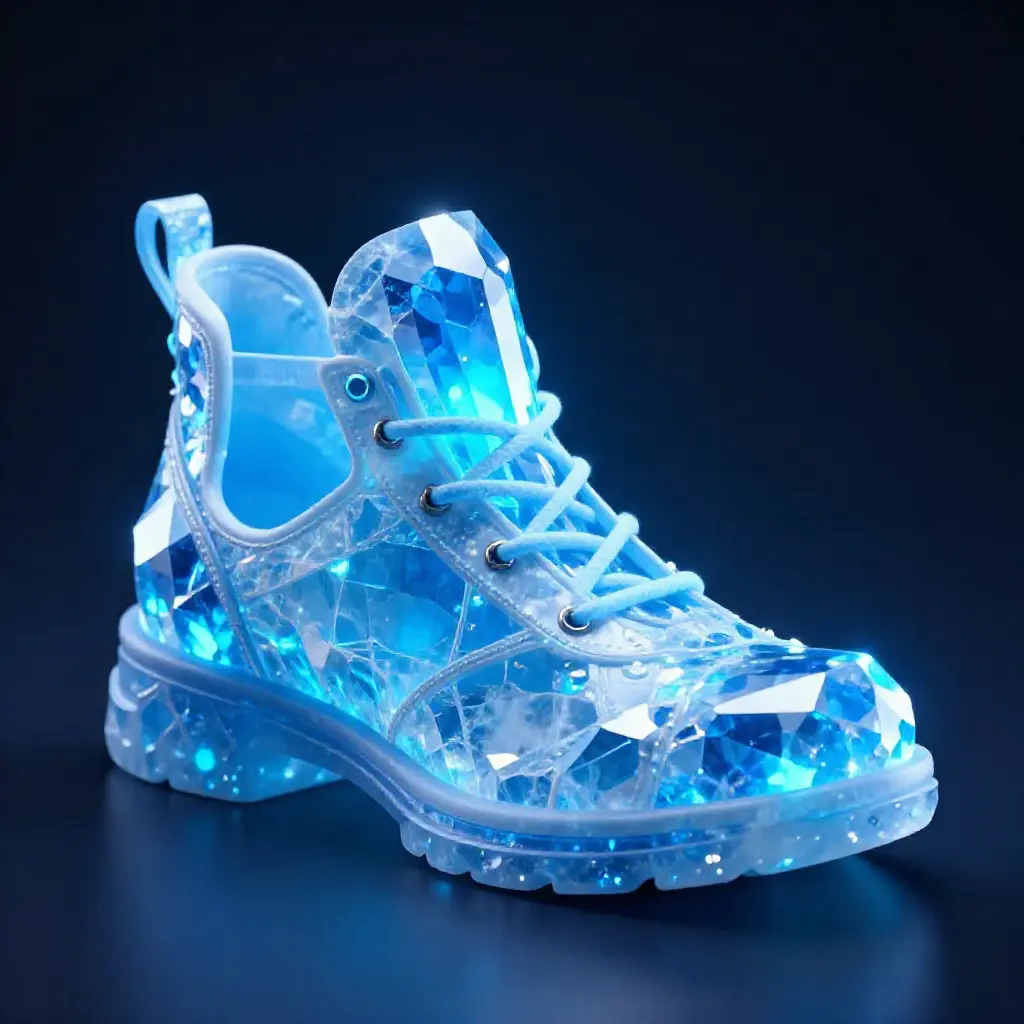
Here’s the same sneaker through four methods, all generating “crystal shoe, dark background, fantasy” at the default strength (0.6), seed 42:


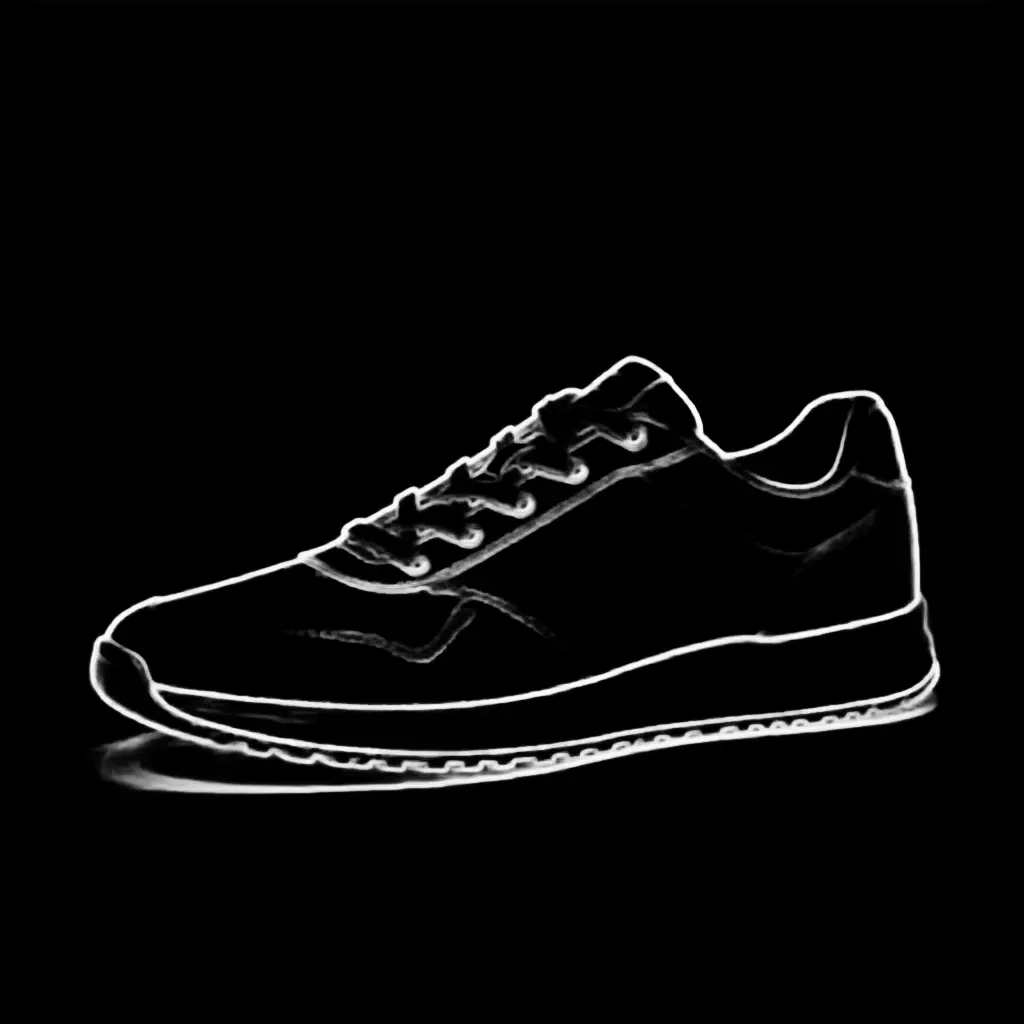

Canny and softedge both follow the sneaker outline closely. Canny gives sharper edges, softedge is slightly more organic.
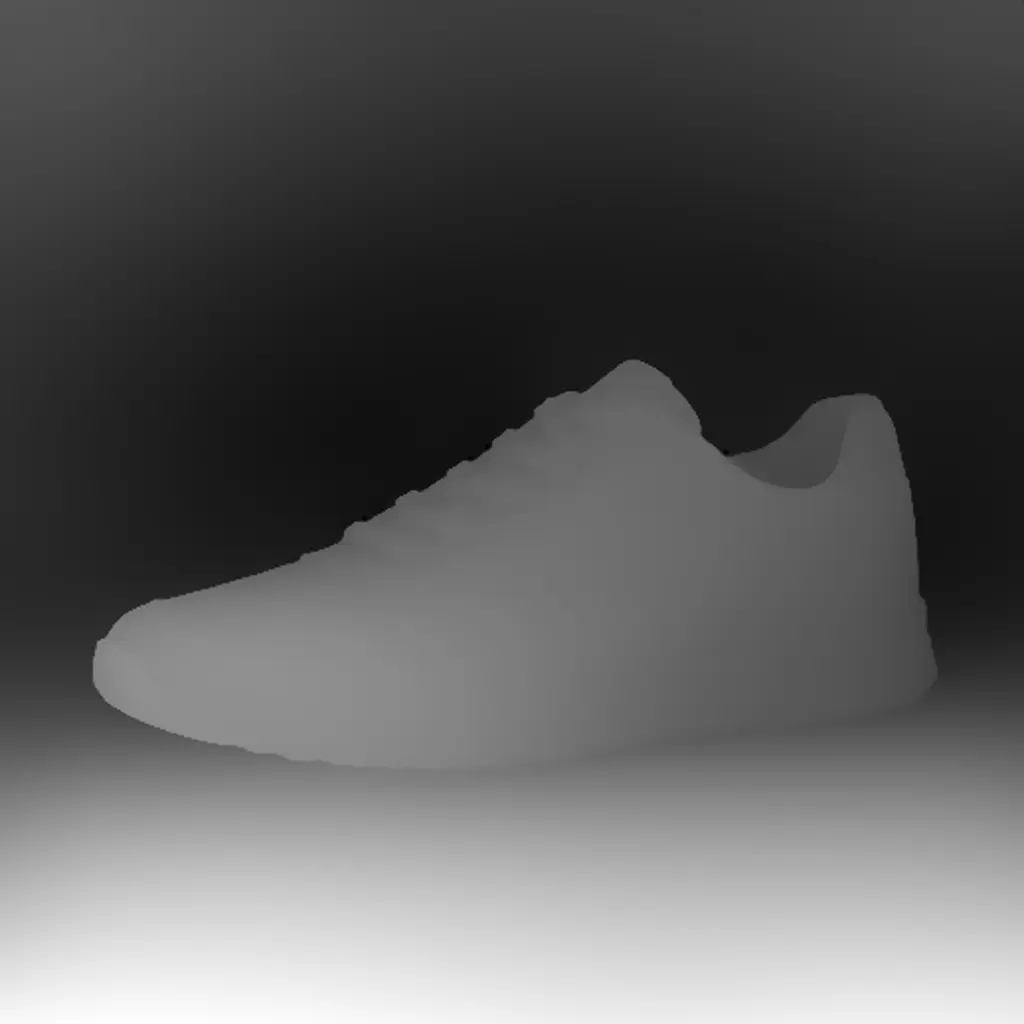
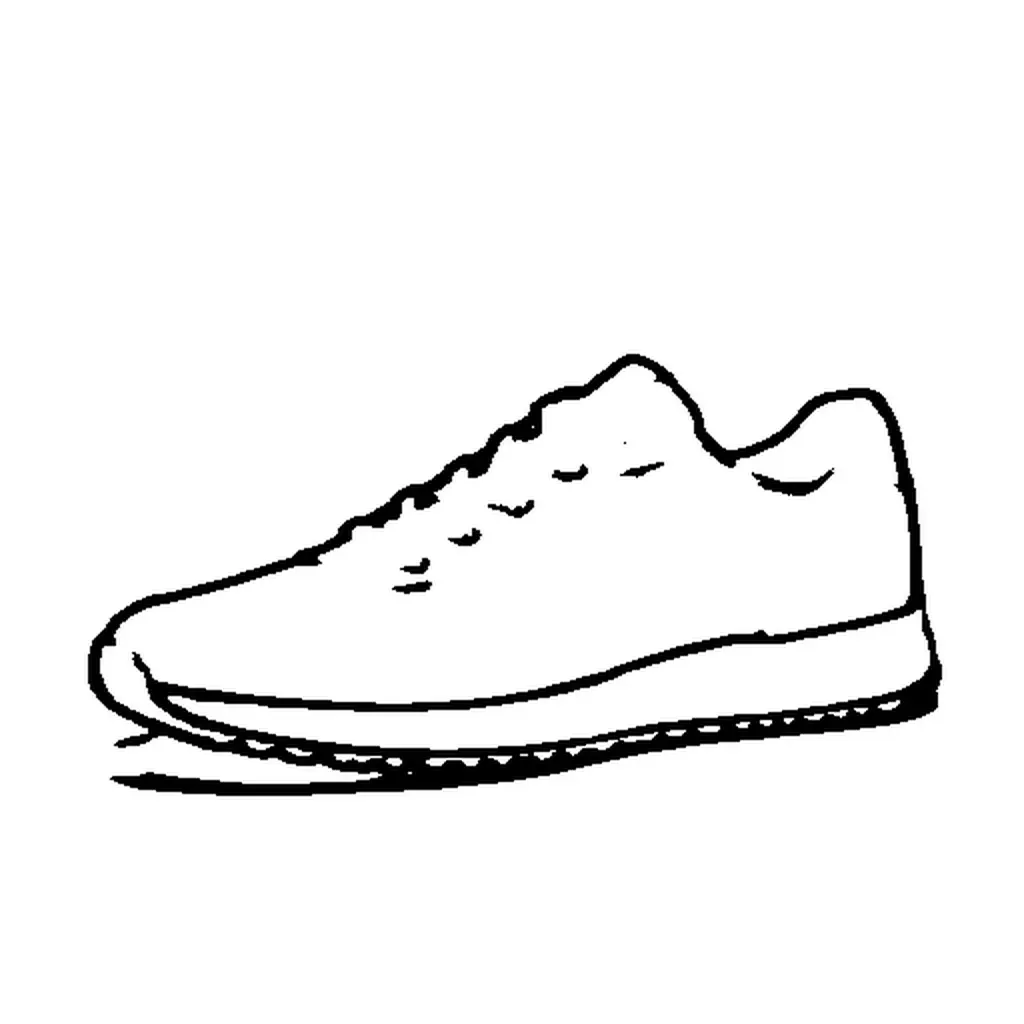
Depth follows the 3D volume with slightly different proportions. Scribble gives the loosest interpretation — the model follows the general silhouette while taking more creative freedom with details.
Lineart produces clean, uniform lines — less noisy than canny on complex textures. Use with --cn-type canny.
Output files follow the convention {stem}_{method}.png.
Choosing a method
| Method | Best for | Strictness | Watch out |
|---|---|---|---|
| canny | Product silhouettes, architecture, clean outlines | Strict | Too noisy on detailed textures (skin, fur). Use softedge instead. |
| softedge | Portraits, organic shapes, natural scenes | Moderate | Pass --cn-type hed when generating (softedge is not a recognized control type). |
| depth | Scene layout, 3D composition, style transfer | Loose | Match --size to the source image aspect ratio or the depth map gets distorted. |
| scribble | Rough shape guidance, creative interpretation | Loose | Use low strength (0.3-0.4) — higher values bleed the binary sketch lines into the output. |
| pose | Human figures, body positioning | Moderate | Needs a visible body. Won’t work on close-up portraits or objects. |
| lineart | Illustration references, detailed line drawings | Moderate | Similar to canny but with smoother, more uniform lines. |
| normal | Surface-aware generation, material transfer | Moderate | Best for objects with clear 3D surfaces. |
Canny for hard-edged objects (products, architecture). Softedge for anything organic (faces, nature, characters). Depth for spatial layout when you want to change the content entirely. Scribble when you want the model to interpret a rough shape freely.
Batch processing
Control parameters
Auto-detection
If your file follows {name}_{type}.png naming, modl vision detects the type automatically:
Tuning strength
Strength controls how closely the output follows the control image. Same prompt, same seed, same canny edges — only --cn-strength changes:
Crystal sneaker at three strength levels. At 0.3 the model invents its own shape. At 0.5-0.6 it follows the canny edges while maintaining good material rendering.
- 0.3-0.4 — Loose guidance. Good for scribbles and depth maps where you want creative interpretation without control artifacts bleeding through.
- 0.5-0.7 — Balanced (default 0.6). Follows the structure while letting the model fill in details naturally. Best starting point for most uses.
- 0.8-1.2 — Strict adherence. Useful for canny edges on clean subjects (products, architecture). Can over-constrain on noisy or organic inputs.
Model support
VRAM guide
ControlNet loads additional weights alongside the base model. On consumer GPUs, the variant matters:
The Z-Image-Turbo ControlNet Union 2.1 comes in two sizes:
- Lite (2GB, 3 control layers) — Natural results, fits on 24GB GPUs. Recommended starting point.
- Full (6GB, 15 control layers) — Strongest control, best detail preservation. Fits on 24GB with automatic text encoder offloading.
Both variants fit on 24GB GPUs. When the full controlnet is active, modl automatically converts the base transformer to fp8 (~5.7GB instead of ~11.5GB) and offloads the text encoder to CPU during denoising. Peak VRAM usage is about 18.5GB with the full variant and 16GB with lite.
Start with the lite variant. If you need more precise structural control, upgrade to full. The full variant preserves more detail and gives tighter shape adherence, but both produce good results at the default strength.
JSON output
Both commands support --json for scripting and agent pipelines:
Tips & gotchas
Things we learned the hard way so you don’t have to:
Strength is the most important parameter. The default (0.6) works for most cases, but different methods need different ranges. Canny and softedge work well at 0.5-0.7. Depth and scribble fall apart below 0.5 — they don’t carry enough structural information at low strength. Scribble above 0.6 bleeds binary sketch lines into the output.
Match your prompt to the control shape. If your scribble looks like a sneaker, don’t prompt for “a boot.” The model will fight between the control signal (low shoe) and the prompt (tall boot), producing a compromise that looks wrong. Work with the shape, not against it.
Canny is too noisy for detailed textures. On faces, skin, fur, or foliage, canny produces a dense mess of edges that overwhelms the model. Use softedge (HED) instead — it captures structure without the noise. Pass --cn-type hed since the Z-Image controlnet doesn’t have a softedge mode.
Match --size to your source aspect ratio. A landscape depth map squeezed into a square output distorts the spatial layout. Use --size 16:9 for landscape sources, --size 9:16 for portrait.
ControlNet metadata is saved. Every generated image stores the control type, strength, end value, and source filename in the PNG metadata. Use modl info <image> or any EXIF viewer to see the exact settings that produced an image.
What’s next
- Upscale, Restore & Score — Score, detect, segment, and more
- From Draft to Final — Upscale your ControlNet outputs to production resolution
- Train a Style LoRA — Combine ControlNet with a custom style LoRA for consistent visual identity
Quick reference
modl process preprocess canny|depth|pose|softedge|scribble|lineart|normal <image>modl generate “prompt” —controlnet <control_image> —base <model>—cn-type— auto-detected from filename or set explicitly—cn-strength 0.6— lower = looser, higher = stricter—cn-end 0.8— stop control early for more creative freedom in final details- Z-Image Turbo + CN fits on 24GB (lite ~16GB, full ~18.5GB peak)