Upscale, Restore & Score Images
Score, detect faces, segment objects, restore faces, upscale, and remove backgrounds — six commands that read an image and output a result. Chain them into pipelines.
modl ships standalone commands for analyzing, enhancing, and transforming images. Each one reads an image, does one thing, and outputs a result. They work on any image, not just ones generated by modl.
We’ll use this cafe scene as our running example:
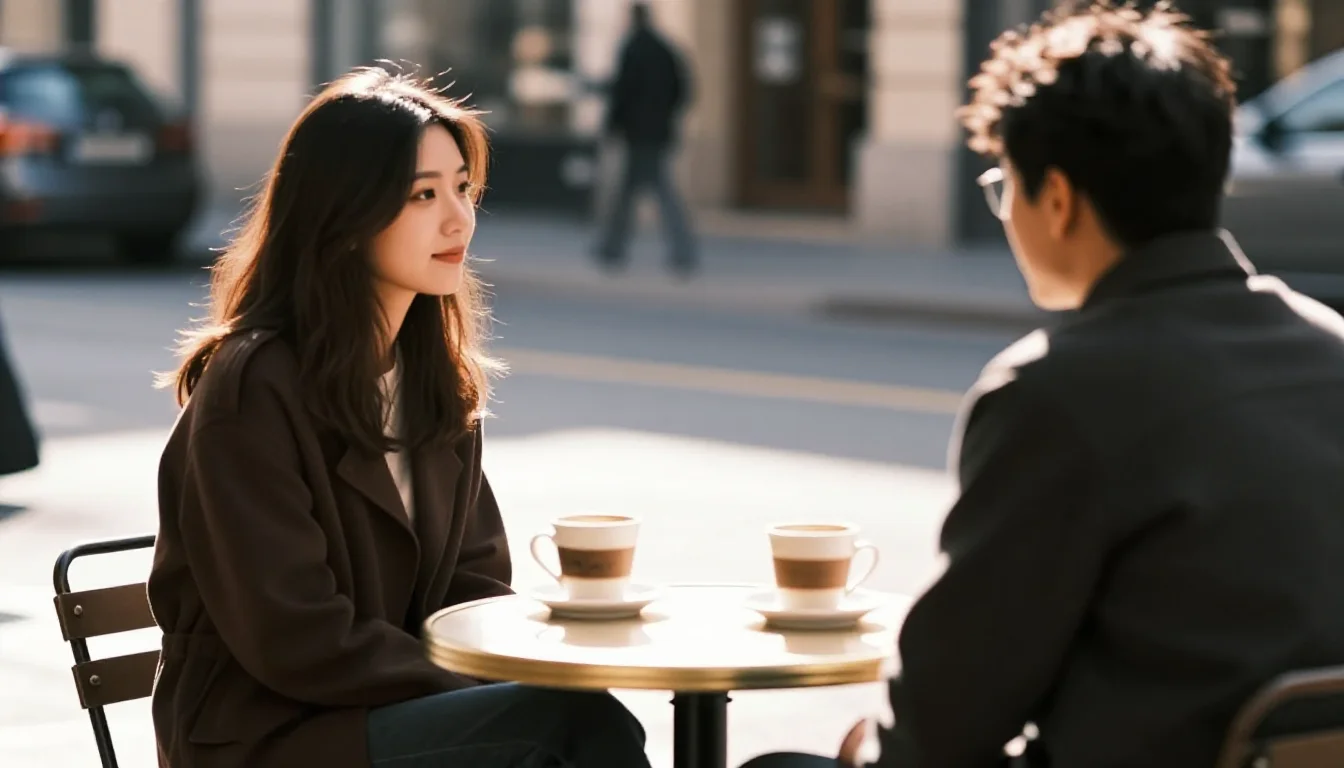
Our test image: generated with modl generate using z-image-turbo.
modl vision score
What it does: Rates an image from 1 to 10 for aesthetic quality. Higher = more visually appealing.
When to use it: Filter out bad generations from a batch, rank outputs by quality, or build auto-retry loops.
The score is an aesthetic prediction — it correlates with how humans rate image quality. A score of 5-6 is decent, 7+ is good, 8+ is excellent. Scores below 4 usually have visible artifacts.
You can score multiple images at once:
modl vision score in a generate-and-retry loop: generate 4 images, score them, keep the best one. With --json output, a script or AI agent can parse the scores and decide automatically. modl vision detect
What it does: Finds faces in an image and returns their bounding box coordinates and confidence scores.
When to use it: Count faces, find face positions for cropping or segmentation, verify your generated portrait has a detectable face.
Here’s what that looks like — the green rectangle is the bounding box, with the confidence score:
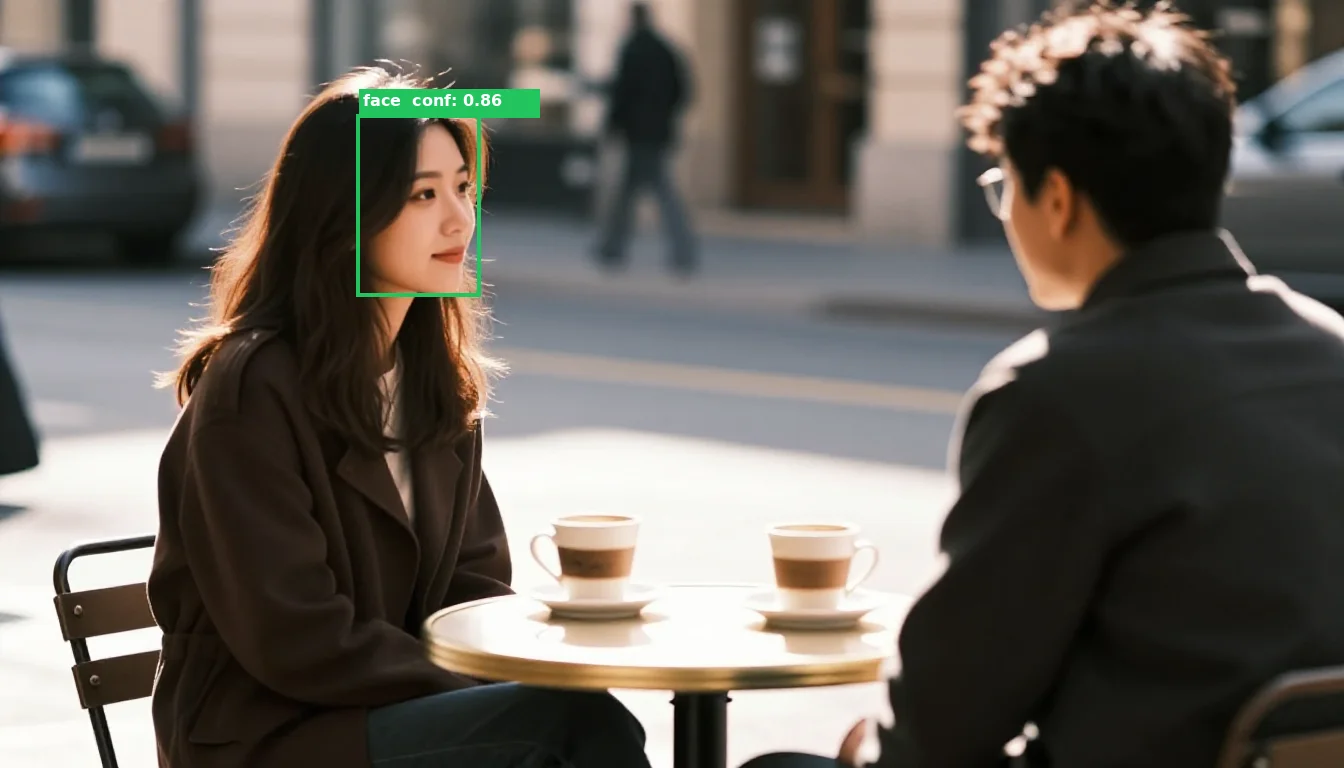
The bounding box [360, 117, 477, 293] is a rectangle around the detected face. The confidence score (0.86) tells you how sure the model is.
Notice it only detected 1 face even though there are two people. The man’s face is turned away from the camera — face detection needs to see facial features. This is worth knowing: detect finds visible, front-facing faces, not just “people.”
What’s a bounding box?
A bounding box is just a rectangle defined by two corners. [360, 117, 477, 293] means: start at pixel (360, 117) in the top-left, end at pixel (477, 293) in the bottom-right. The face sits inside that rectangle. These coordinates are what you pass to modl process segment --method sam to get a pixel-perfect mask.
modl vision detect to find faces, then pass each bounding box to modl process segment --method sam to get precise masks. This lets you target individual faces for inpainting. modl process segment
What it does: Creates a mask — a black-and-white image where white pixels mark the region of interest. Masks are the language of image editing: they tell tools like inpainting “regenerate only the white area.”
Segment has three methods, each for a different job:
Method 1: SAM (Segment Anything Model)
Point at something — by bounding box or by clicking a point — and SAM cuts it out with pixel-perfect edges.
With a bounding box (from detect):
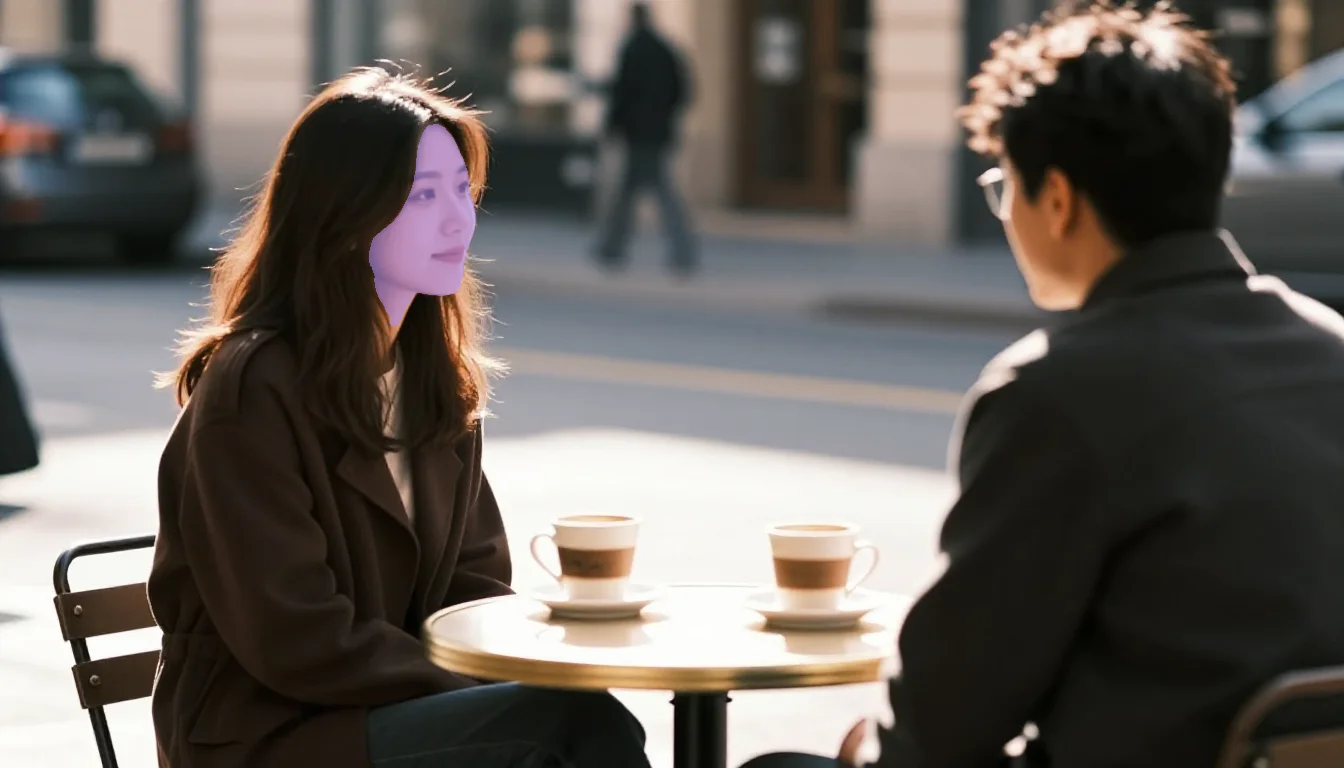
Left: the rectangular bounding box from detect. Right: SAM refines it into a pixel-perfect mask that follows the actual face contour — not just a rectangle.
With a point click — just give SAM an (x, y) coordinate:
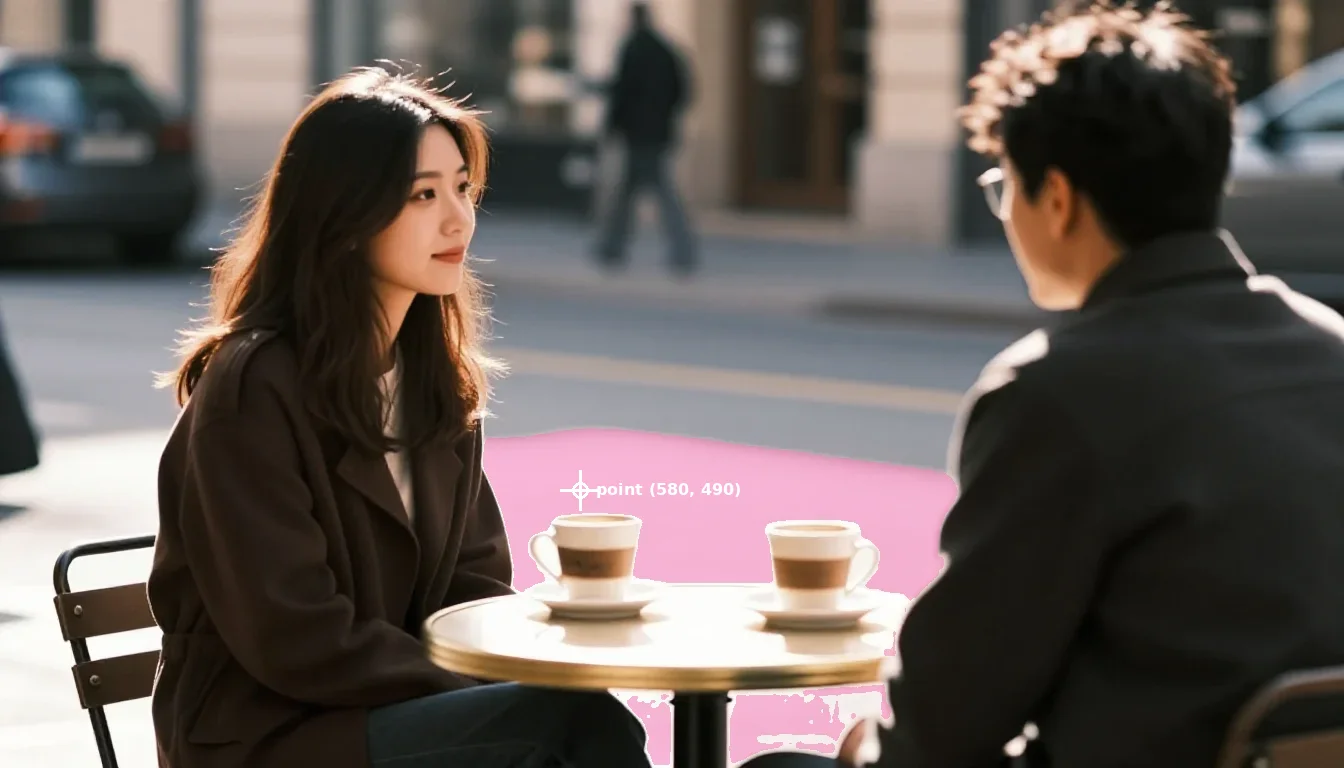
The crosshair shows where we clicked (580, 490). The pink overlay shows what SAM selected — the table surface and the area around the cups. SAM grouped visually connected pixels into one region.
This is a key concept: SAM doesn’t understand language. It doesn’t know what a “cup” or “table” is. It sees pixels and groups ones that look connected. When you click on the table edge near a cup, it segments the table — because the table surface is one connected region.
SAM returns just a mask — no labels, no object names. If you need to find a specific object by name (like “the glass” or “the red car”), use modl vision ground instead — see Caption, Tag & Detect Objects.
How SAM sees your image
Here’s what happens when you click 6 different points across the same image. Each colored region is a separate SAM call — the labels are added for illustration, SAM only returns the mask:
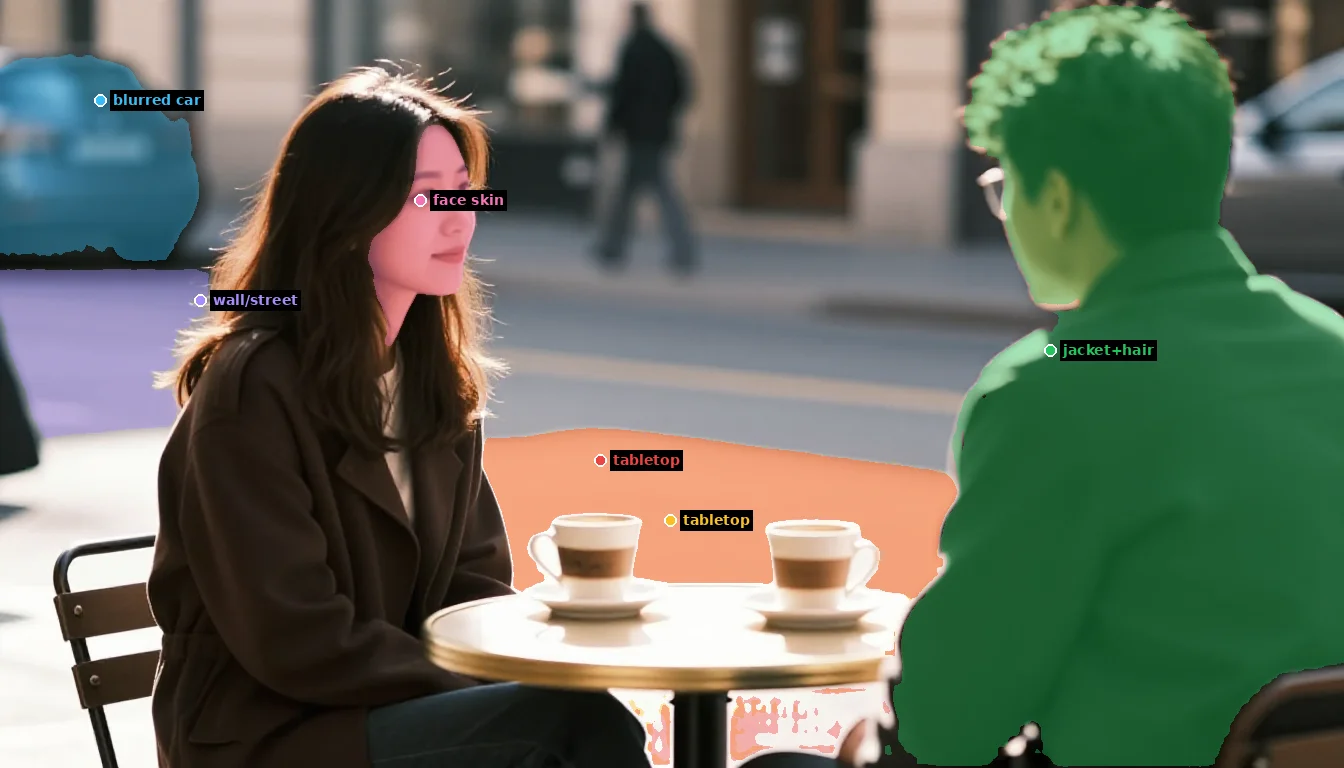
Each dot is a --point click. Each color is the mask SAM returned. The labels describe what SAM actually selected — not what we intended to click on.
Key observations:
- Clicking near the woman’s arm selected the wall behind her (purple) — the click landed on background pixels, not on her coat
- Two different clicks both selected the tabletop (red + amber) — clicking near a cup doesn’t select the cup, it selects the table surface the cup sits on
- The cups were never selected at all — SAM sees the table as one connected surface and the cups as holes in it
- “face skin” is correct (pink) — the face has distinct pixel values from hair and background, so SAM isolated it precisely
Method 2: Background
Separates the foreground subject(s) from the background using BiRefNet. No coordinates needed.
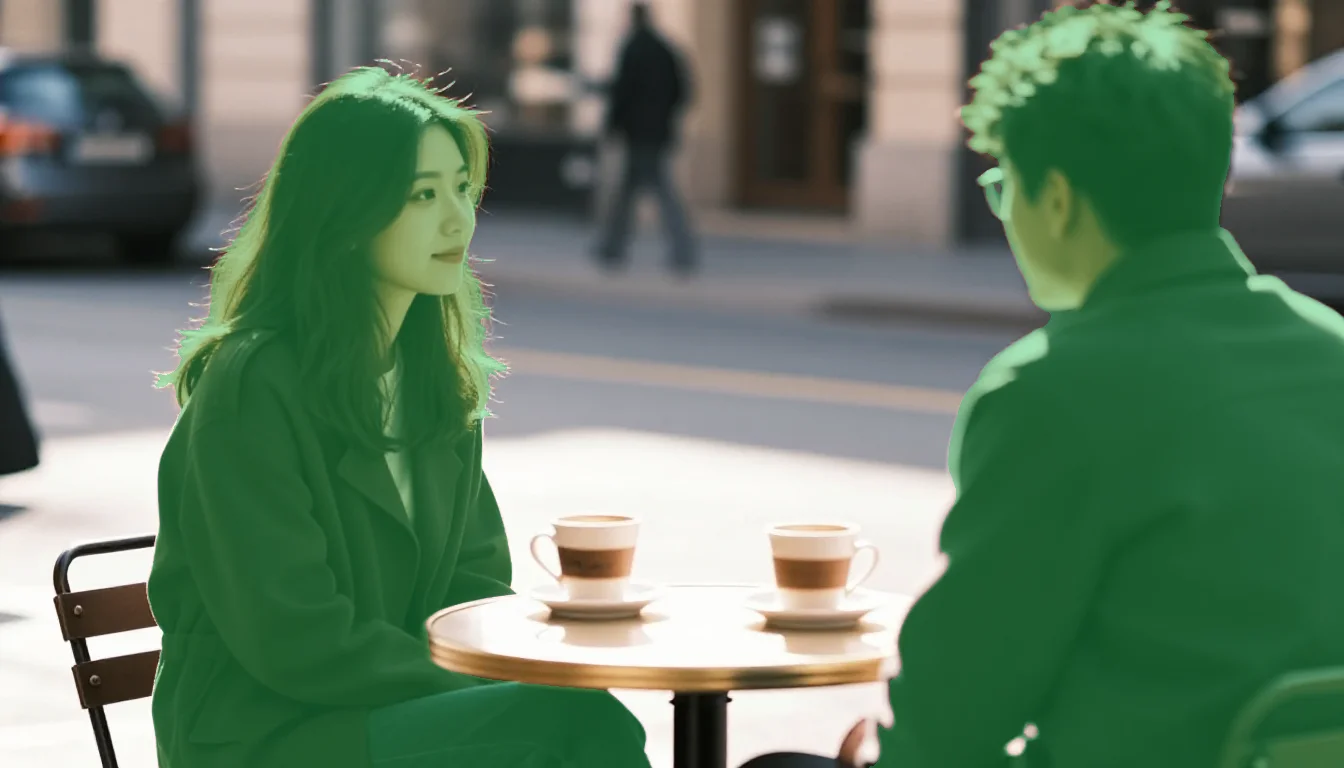
Green overlay = foreground (both people and their clothing). Everything else is background. This mask could be used to replace the background while keeping the people.
Method 3: Bounding box
The simplest method — just creates a rectangular mask from coordinates. No neural network, no pixel-level precision. Useful when you want a rough region for inpainting and don’t need pixel-perfect edges.
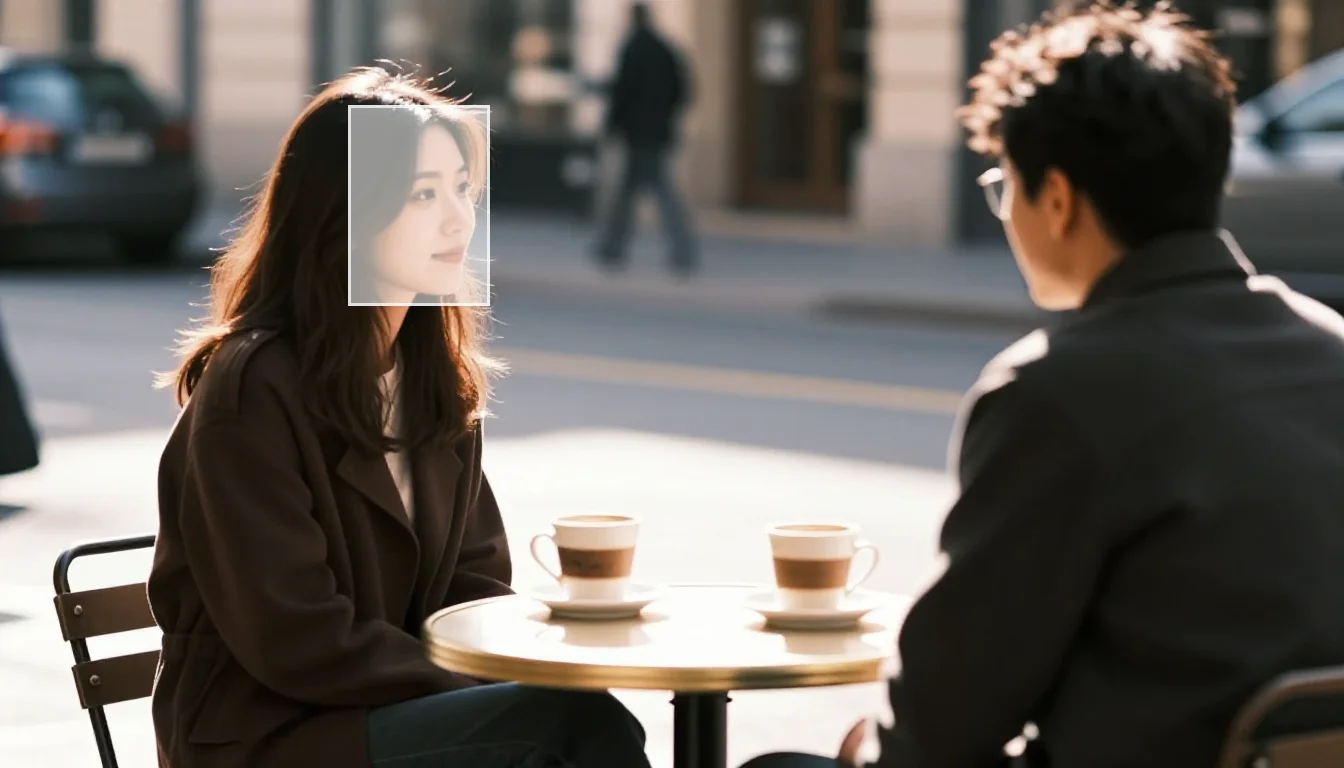
The bbox method creates a simple rectangle. Compare this to the SAM face mask above — SAM follows the face contour, bbox just draws a box. Bbox is faster and sometimes good enough.
What are masks for?
Masks are how you tell a generation model where to change an image. When you pass a mask to inpainting, the model only regenerates the white region and leaves the rest untouched:
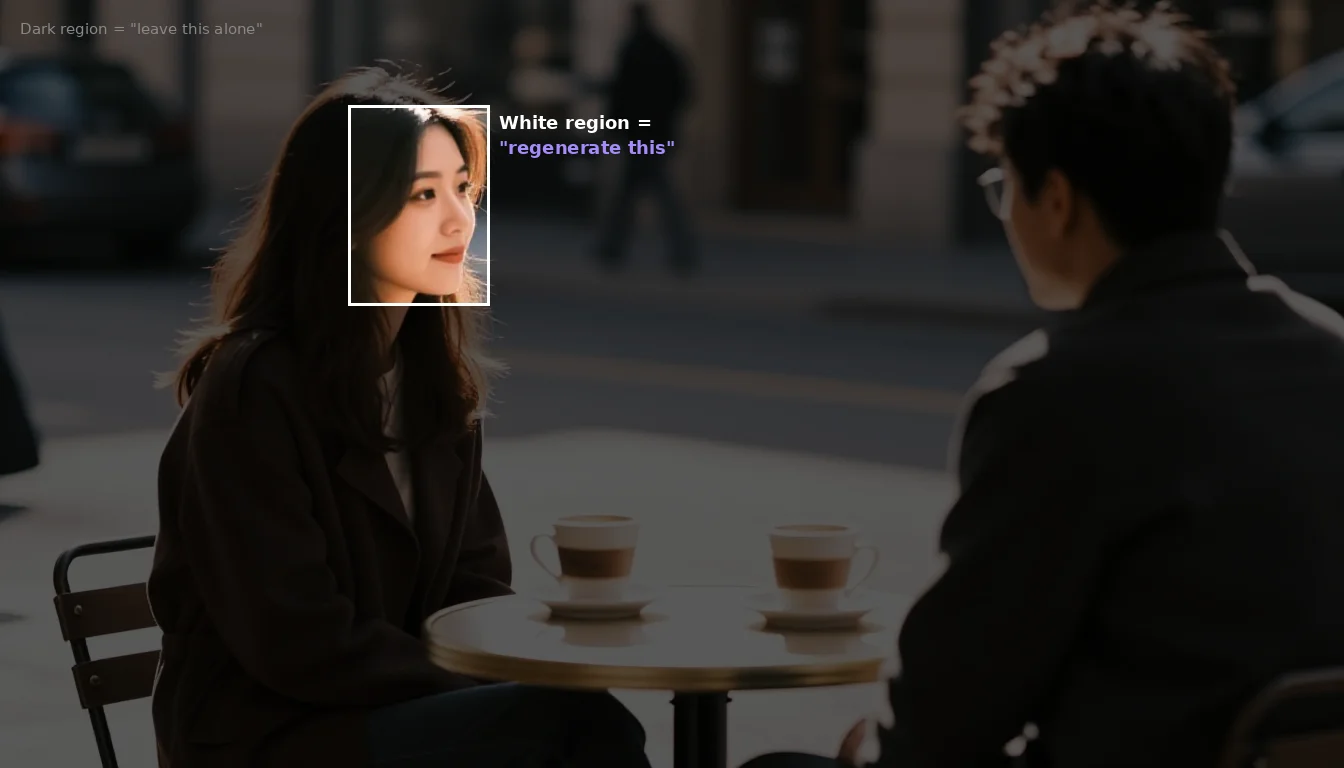
This is what a mask means to the inpainting model. The bright region (white in the mask) gets regenerated. Everything else stays exactly as it is.
To use it: modl generate --init-image cafe.png --mask face_mask.png "a different expression". The model would only modify the face region — the rest of the image stays pixel-identical.
The --expand flag (default: 10px) feathers the mask edges outward so the inpainted region blends smoothly with the surrounding pixels instead of having a hard seam.
modl process upscale
What it does: Increases image resolution 2x or 4x using Real-ESRGAN. A 1024x1024 image becomes 4096x4096 at 4x — sharp enough for print.

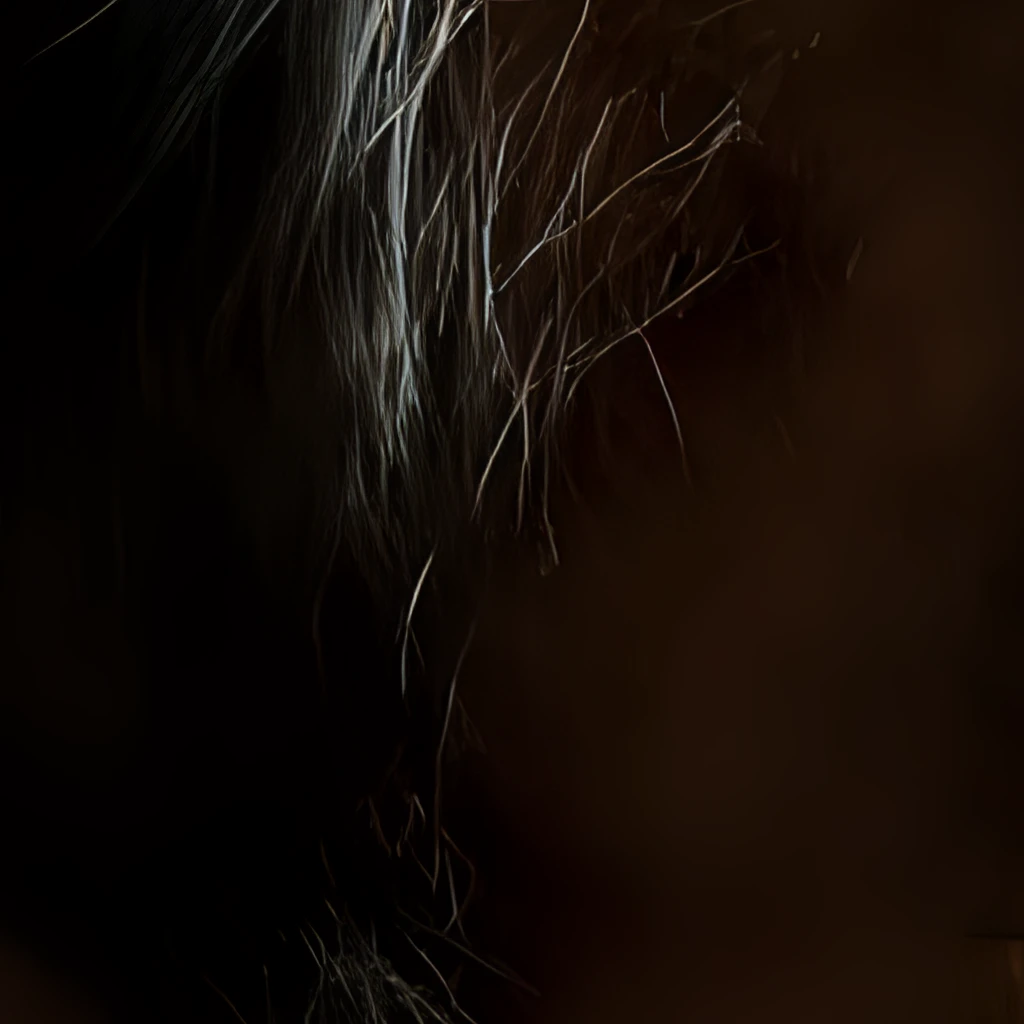
Zooming into the eye area: the upscaler adds real detail, not just interpolation. Skin texture, hair strands, and eye reflections are reconstructed.
modl process remove-bg
What it does: Strips the background and outputs a transparent PNG. Clean cutouts for product photos, stickers, compositing, or placing subjects on new backgrounds.
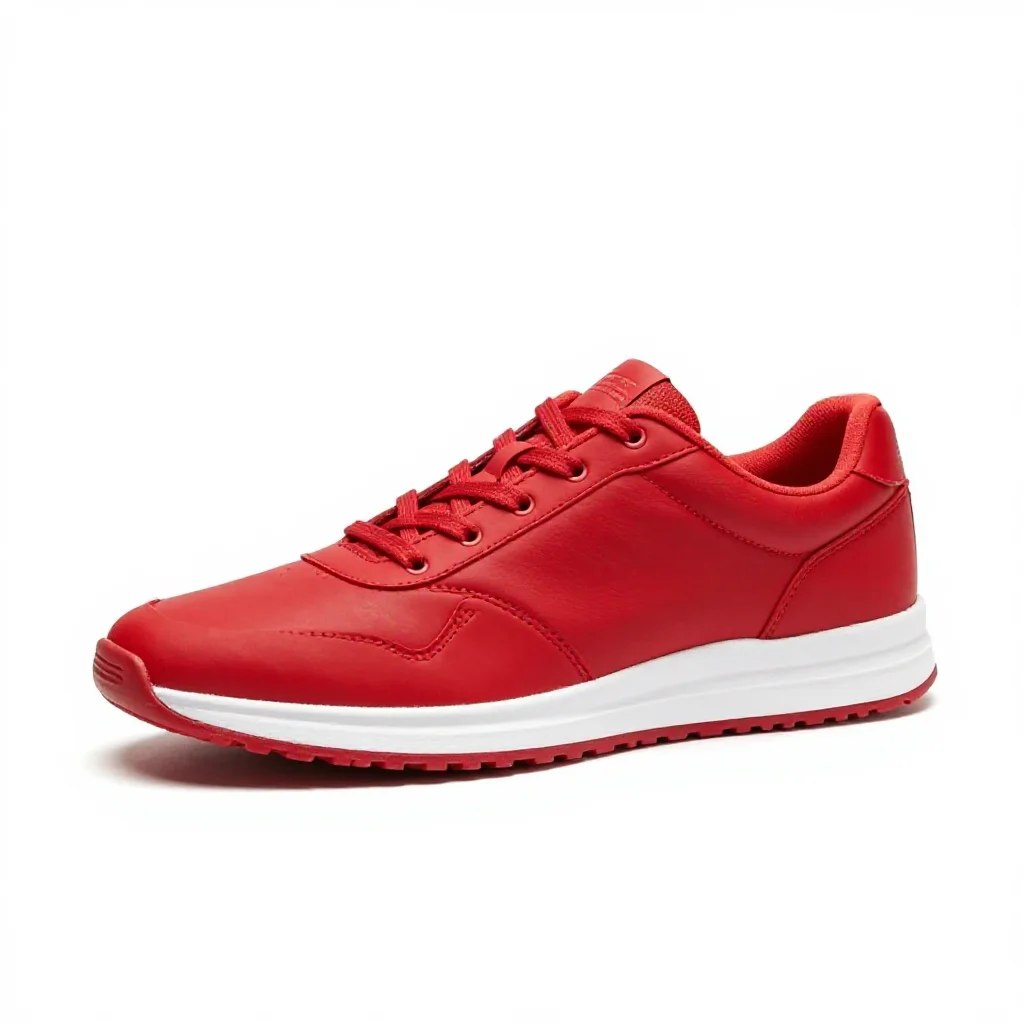
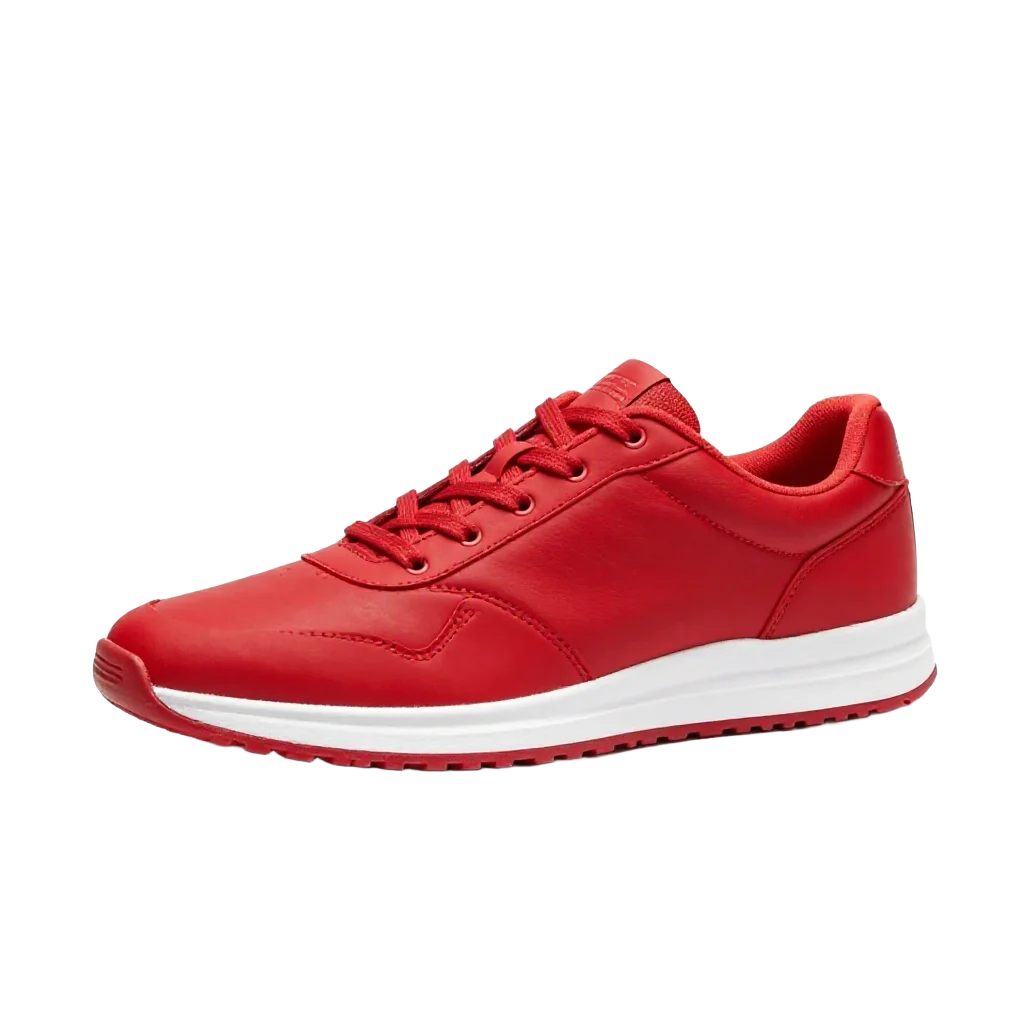
Clean cutout with transparent background. The edges follow the shoe contour precisely — no manual masking needed.
remove-bg and segment --method background: remove-bg gives you the final transparent PNG. Segment gives you a black/white mask that you can pass to inpainting. Use remove-bg when you want the cutout; use segment when you want to modify the background. Chaining primitives
Each primitive takes an image and outputs a result — chain them in sequence.
Product photo pipeline
Generate → remove-bg → upscale 4x → score. Full product photo pipeline in 4 commands.
Portrait post-processing
Quality filter for batch generation
Every primitive supports --json for structured output. A script or AI agent can parse the JSON and make decisions automatically.
What’s next
These primitives work on coordinates and pixels. To find objects by name (“where’s the coffee cup?”), generate captions, or auto-tag images, see Caption, Tag & Detect Objects.