Generate, Train & Browse From Your Browser
Launch modl's built-in web interface for visual generation, training management, and output browsing — all running locally on your machine.
Launch
One command. The web UI is built into the same binary as the CLI — no separate install, no Node server, no Docker.
Open http://localhost:3333 in your browser. Everything runs locally — your images, your GPU, your data.
Run on boot
Want modl serve to start automatically? Install it as a system service:
Works on Linux (systemd) and macOS (launchd). Remove with modl serve --remove-service.
Generate
The generate tab is the main workspace. Prompt on the left, canvas on the right.
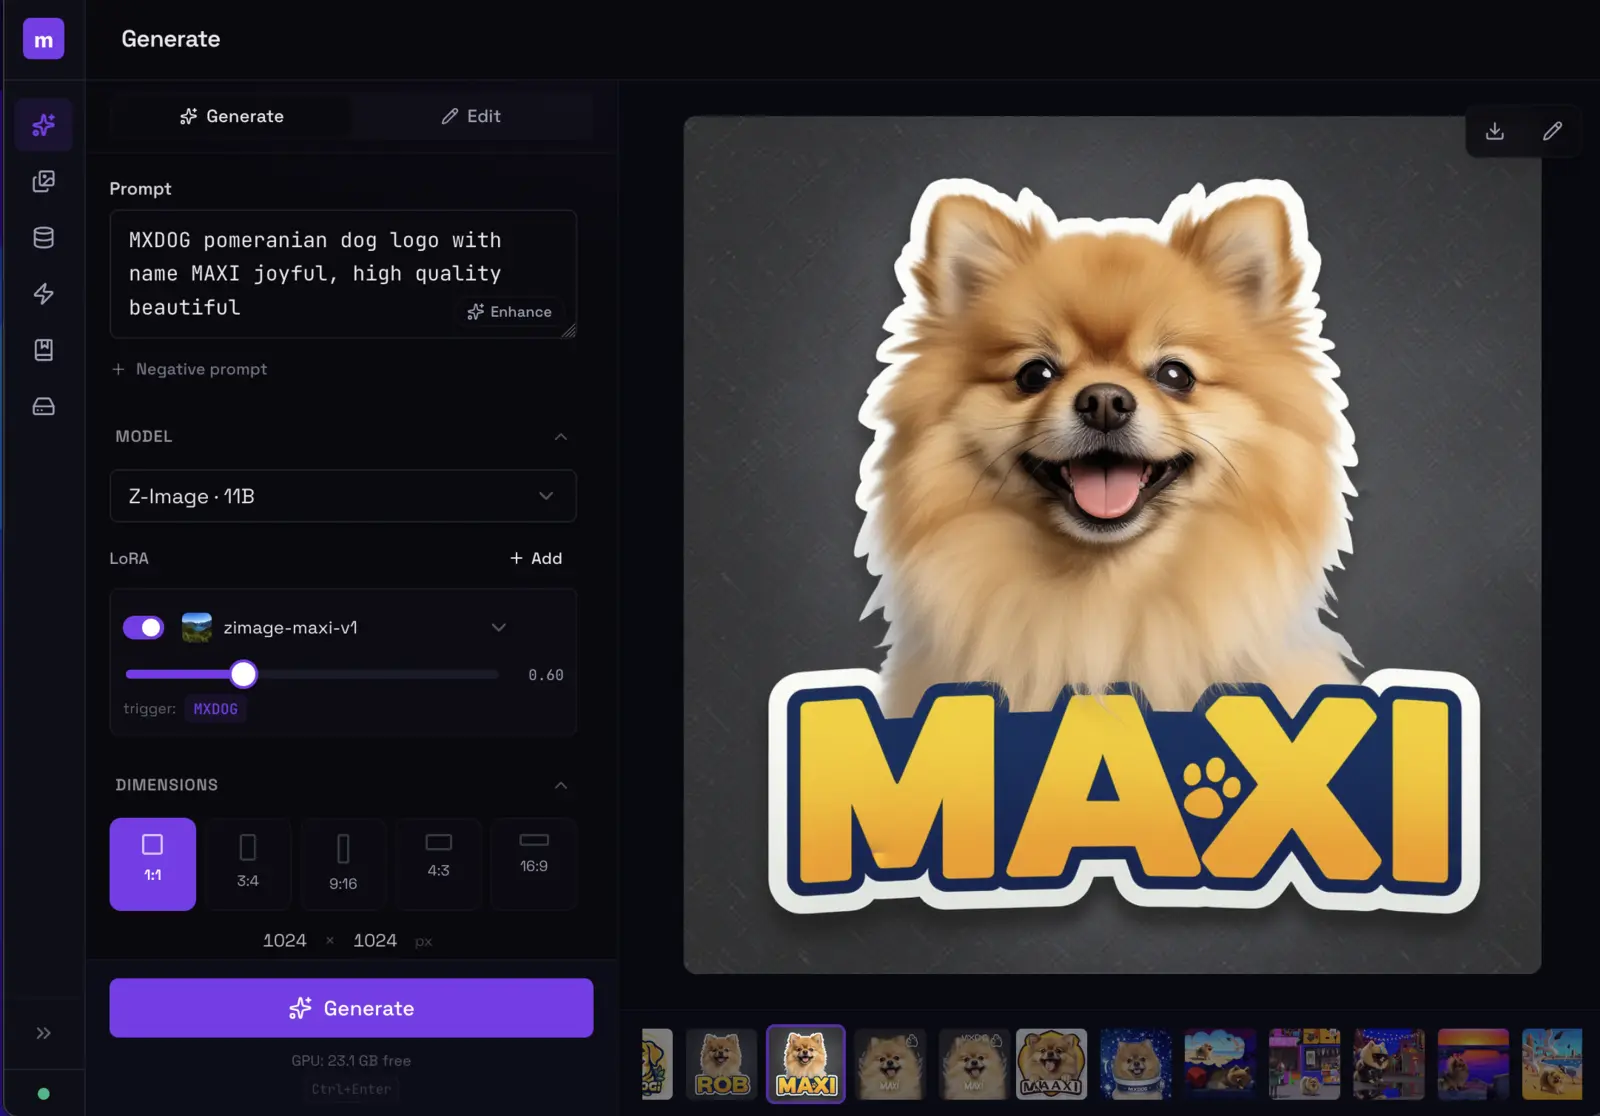
Type a prompt, pick a model and LoRA, hit Ctrl+Enter. The image streams in real-time.
The left sidebar gives you control over:
- Prompt — with an optional AI enhance button that rewrites your prompt for better results
- Model — dropdown showing installed models with quality/speed ratings and capability badges
- LoRAs — add one or more LoRAs with per-LoRA strength sliders and trigger words
- Dimensions — aspect ratio presets (1:1, 3:4, 9:16, 4:3, 16:9) or custom width/height
- Sampling — steps, guidance scale, and seed (lock the seed for reproducible results)
The model selector shows which capabilities each model supports — img2img, inpaint, text rendering, LoRA. Pick one that matches what you need.
img2img and inpainting
Expand the Reference Image section to use an existing image as a starting point. Upload an image, set the denoise strength (lower = closer to original), and generate.
For inpainting, upload a mask alongside the reference image. The model will only regenerate the masked region.
Edit mode
Switch to the Edit tab at the top of the prompt panel. Upload one or more source images and describe what to change — “add sunglasses”, “change the background to a beach”, “make it nighttime”.
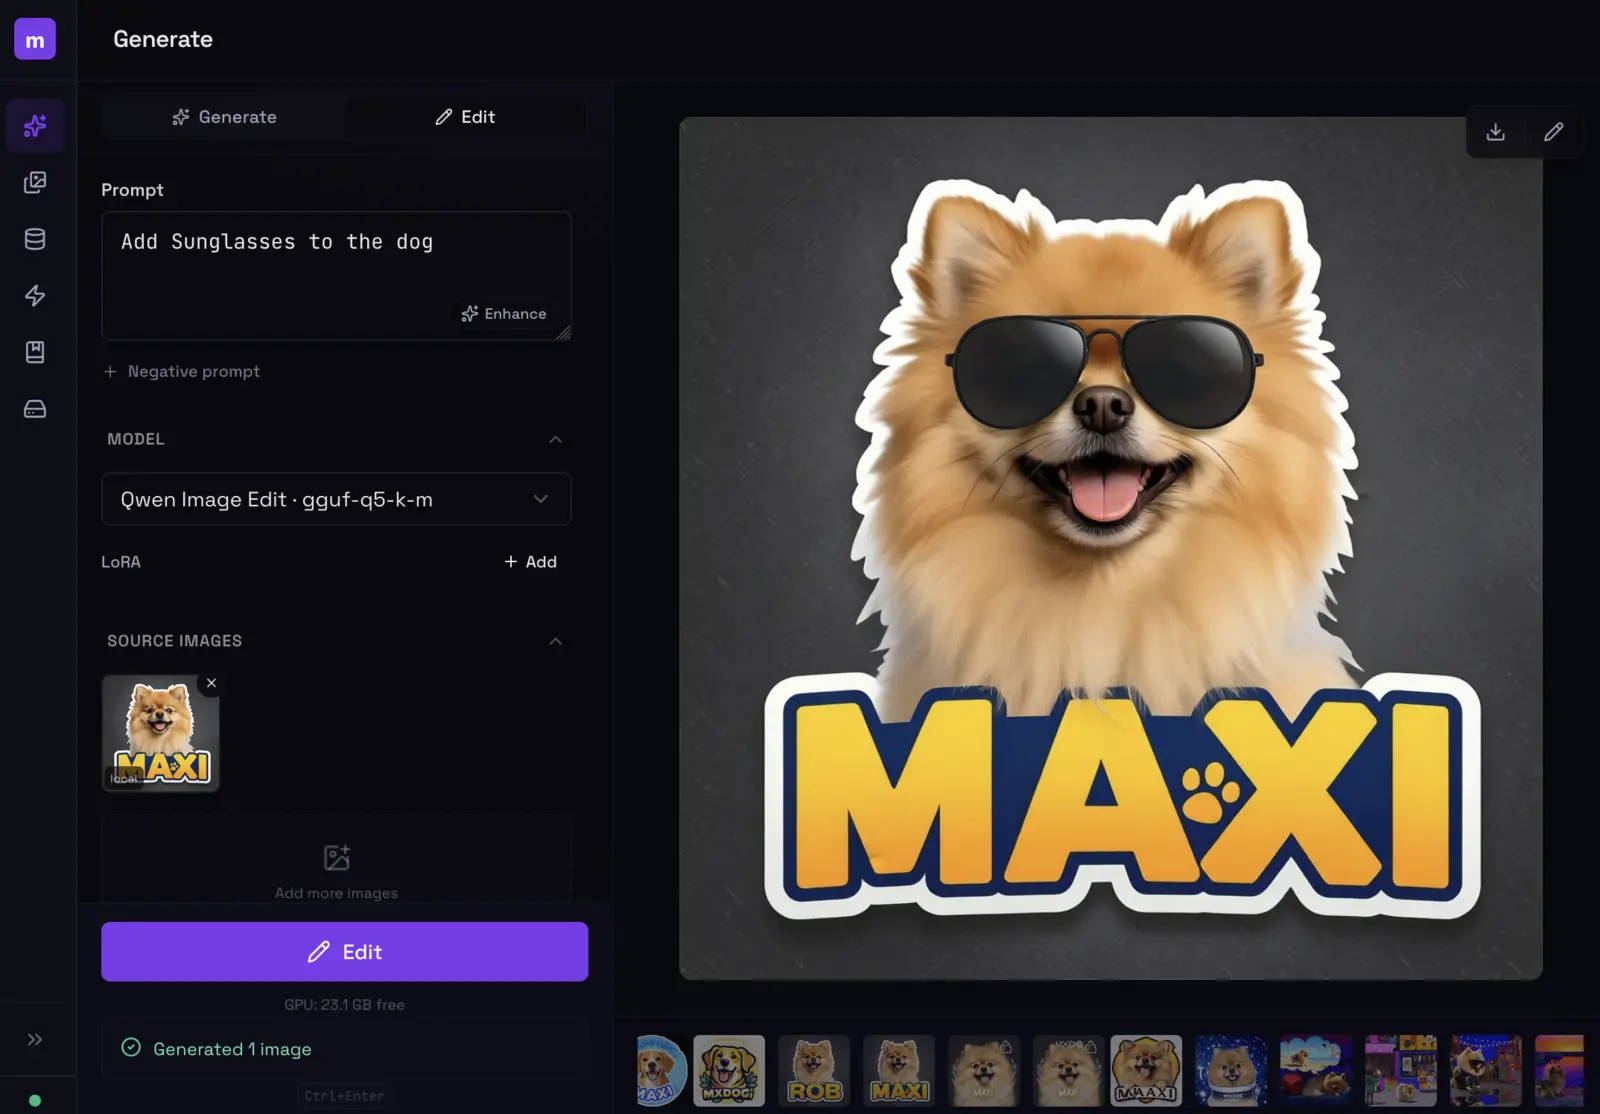
Edit mode: upload an image, describe the change. Here, 'Add sunglasses to the dog' — and they appear.
Session history
Every generation creates a session. The strip at the bottom of the canvas shows your session history — click any to revisit past results without losing your current prompt.
Outputs
The outputs tab is your image library. Every image you’ve ever generated is here, organized by date.
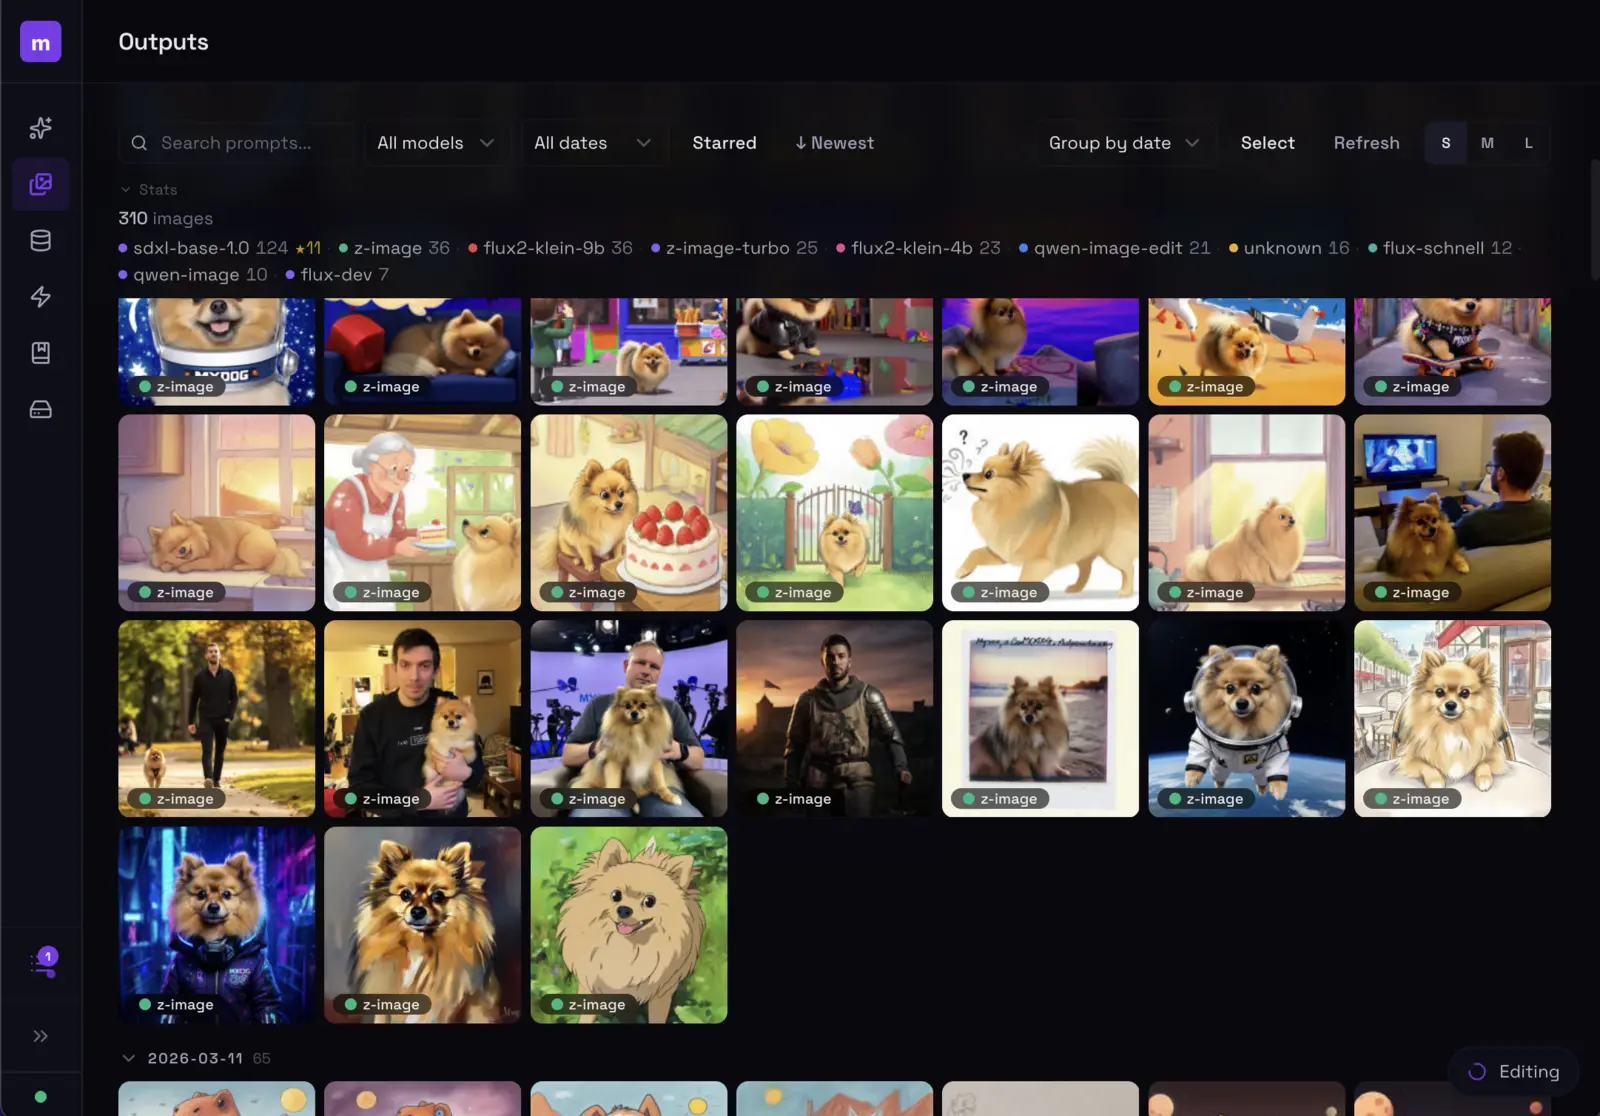
Browse, filter by model, search prompts, and manage all your generated images.
Click an image to see its full generation parameters — prompt, model, steps, seed, guidance, LoRA, everything.
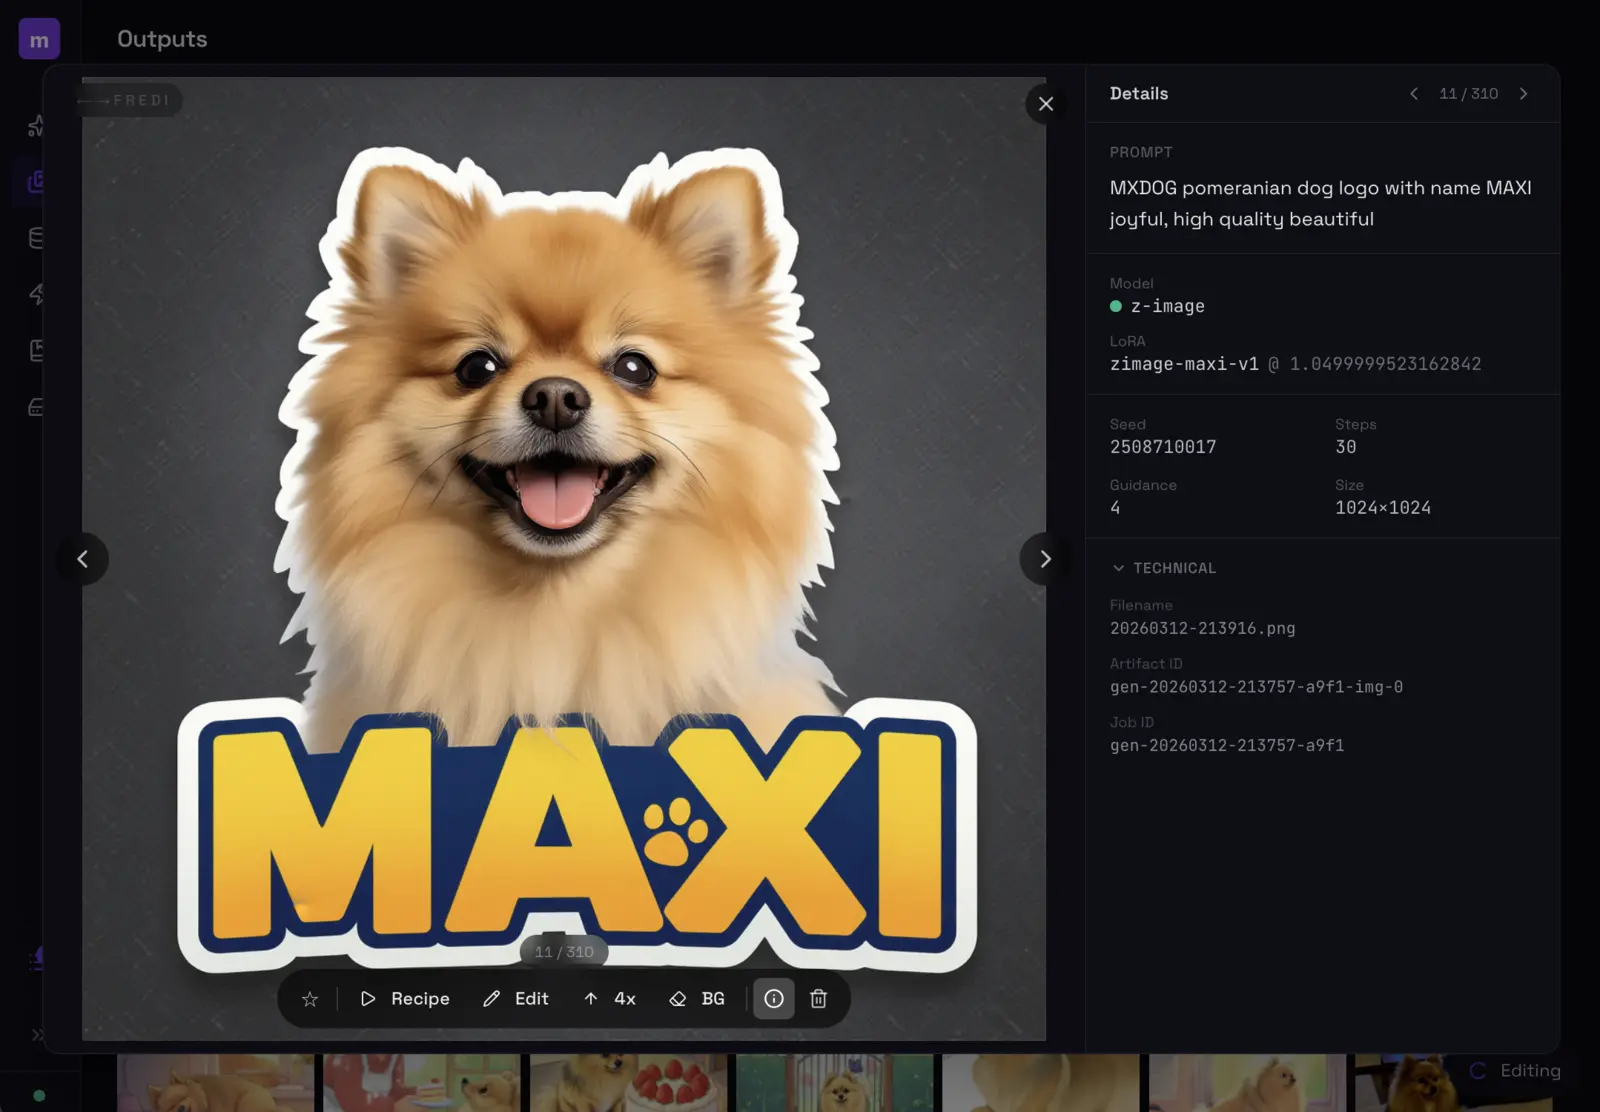
Every image stores its full recipe. Hit Recipe to reload all parameters, Edit to modify, 4x to upscale, or BG to remove the background.
The action bar gives you one-click access to:
- Recipe — loads all parameters back into the generate form
- Edit — opens the image in edit mode
- 4x — upscale to 4x resolution
- BG — remove the background
- Star — favorite for later
Training
Start and monitor LoRA training runs from the UI. Same engine as modl train from the CLI.

Training dashboard: browse runs on the left, see sample outputs evolve across prompts on the right.
Create a new training run by selecting a dataset, base model, and name. modl handles parameter selection based on your dataset size and model architecture. The training view shows:
- Sample images generated at each checkpoint interval
- Run status (running, completed, interrupted, failed)
- Base model and trigger word for each run
For training tips — captioning strategy, preset selection, evaluating results — see Train Your First Style LoRA.
LoRA Library
All your trained LoRAs in one place. See training metadata, preview sample outputs, and use any LoRA directly from the generate tab.
Datasets
View and manage your training datasets. See image counts, captions, and dataset metadata.
Models
The models tab shows everything installed on your machine, grouped by type — diffusion models, checkpoints, LoRAs, VAEs, text encoders, ControlNets, and more. Each model shows its source (HuggingFace, trained locally, registry) and file size. You can delete models you no longer need directly from the UI.
CLI + UI = same engine
The web UI isn’t a separate product — it’s the same Rust binary, the same core logic, the same Python worker. Anything you do in the UI produces the same results as the equivalent CLI command. Your outputs, models, datasets, and training runs are shared between both.